Friday, July 27, 2012

Scrappy Saturday

Scrappy Saturday 

YES! Scrappy Saturday is back after a 3 week hiatus!  Things have just been so crazy this past month it took my a while to get around to renewing my inlinkz account.  But I am excited to have it back on and can't wait to see all the awesomeness you all have in store!  Our house was just listed on the market and we had our first showing today, we will see how it all goes but that has been keeping me busy...normally I like MAKING messes with my kids, having fun and doing projects and now I'm constantly cleaning and avoiding messes...ANYWAYS...

I also have an announcement to make.  August 19 I will be one of the co-hosts of the One Day Once a Month Thee Networking Blog Hop hosted by Kelly at Live Laugh Rowe

Mark Your Calendars and grab the button for your side bar as a little reminder if you like! :)  The more the merrier!


Photobucket

<a href="http://www.livelaughrowe.com/blog-hop/"><img src="http://i1184.photobucket.com/albums/z329/Kelly_Kuert-Rowe/Buttons/August.jpg" border="0" alt="Photobucket"></a>

Here are some of the featured posts from the last link up (3 weeks ago)

Starting clockwise from the top left

Housewarming Wreath by Living Loving Crafting
Downsizing the Supersize Dress Refashion by Petites Pashions
Beachy Living Room by Meeha Meeha
Rustic Star by A Creative Princess


Now link up your awesome projects using scraps (of any kind), upcycling, redo/makeovers, and anything you made including materials you found or had on hand.  We love thrifty, resourceful creativity!

if you like this linky/blog you can follow me on GFC, Facebook, Twitter, Pinterest or vote for me on Top Mommy Blogs...:)

Visit some of the other links and leave some comment love :)

No Giveaways

grab a button and post it with your other linky lists por favor ;)


Friday, July 20, 2012

The Dress - Painting with Plaster

The Dress
Painted with Plaster
Photobucket
Photobucket
The first time I made a painting where the image was made with plaster and then painted over for a 3D effect was in college when I was doing some works for a production at the Yakima museum.  I made six 6x6 ft paintings...each one themed after the music compositions that were being performed.  My sister choreographed a dance to go with each song too so the production was a combination of live jazz, dance and visual art.  It was cool.  The plaster was used on a painting called Punctuation.  I made a huge punctuation mark on the canvas with plaster, then painted the whole canvas a solid color and then splattered it all jackson pollock style...I thought it went with the theme of punctuation with the punctuated marks they left.  ANYWAYS, I really enjoyed using plaster and have wanted to do it again ever since.  I have ALSO been wanting to make a dress painting for a long time too...like .....Then, a few months ago when I was researching faux finishing when I was getting ready to do the bathroom makeover  I discovered Segreto Finishes by Leslie Sinclair and fell in LOVE.  Then I was looking through the Segreto Art Gallery and saw the paintings by Rachel Schwind and saw the paintings she made with plaster and was inspired.  Her dress paintings with plaster are like the perfect combination of the 2 types of paintings I've been wanting to do for the last few years!  So I made this for the master bedroom.  

work in progress...
Photobucket
work in progress....
Photobucket

I wanted to make it more greyish and muted the way Rachel Schwind does, but wanted to have some blue undertones so I painted a mix of grey and teal on the background and then just teal over the dress.  I started adding a white-ish wash to the background..toning it down...but then I couldn't bring myself to do it over the dress...it wasn't what I intended...but I loved the pop of color...it still has the simplicity I wanted anyways.  I used plaster and painted it on with a palette knife.  waited for it to dry and then added paint.  Only mistake...I should have not done this on a canvas...the plaster is cracking like crazy so I am going to get a bunch of midge podge and paint that over top of the whole thing to try to keep it from cracking further and hopefully keep any plaster from cracking too much and falling off!  I would be so sad.  The cracks aren't too noticeable unless you get up and look real close but they make me nervous!  The punctuation painting was on canvas too and there was no cracking...even after trasport in a u-haul but maybe it was because that canvas was so thick and sturdy...these canvases I've been buying are really inexpensive and are light and flimsy...I'm not even sure if it's real canvas..it's almost papery because if I get it too wet...the edges start to fray...so maybe that is the problem.  But large canvases are EXPENSIVE!  This one was $16! and it's a good size!  you get what you pay for I guess.

Photobucket

And after I made this dress painting, my 5 year old, who is dress obsessed, wanted to make a dress painting too and design her own dress so I did a google image search for dress paintings and let her pick out a reference picture and she made this, all by herself and she is so proud of it she keeps saying we need to send it to a factory so they can make it into a real dress.
Photobucket

When she seriously wants to draw something, I sit down and give her a little instruction by drawing the same picture along side her on my own paper and explaining what I'm doing as I go and then she draws hers at the same time.  It's from the Monart method when I was teaching art classes and it's nice because I never touch her picture and she can look at it after and be proud that she did the entire thing by herself.  As you can see I turned mine into a silly clown picture as we painted along side each other.  She wanted it to have polk-a-dots so I had her make the dots with crayons and then paint watercolor overtop, a 5 year old couldn't paint a polk-a-dot dress it would be a mess...so this worked well and kids always love seeing the crayon resist the watercolor.  When is was dry she added glitter.
Photobucket

While doing the google image search for "dress paintings" we found the artist Roxanne Rossi and I am LOVING her dress paintings.  So simplistic and beautiful I had to share!  Almost made me wish I painted something like this instead of the plaster dress....(almost! still love the plaster dress painting)


Thursday, July 19, 2012

DIY Song Lyric Canvas Art

Song Lyric Canvas Art
Photobucket
So if getting a house ready to put on the market and taking care of a 5 and 2 year old aren't enough...Our walls were so bare because we've only been here a year and all the ideas for art I wanted to make...I hadn't gotten around to doing yet.  So as we were staging the house, I decided I was just going to buckle down and make some of the things I had been wanting to try but just haven't had the pressure to actually get it done.  That way, the house wouldn't be SO empty, especially since all we had up were family photos which we had to take down.  PLUS, the now I'll have some new art to hang up right away after we move into a new house and those walls won't be bare like this house has been.  Apparently I can get a lot done when I have no time...funny how that works!  (I've made 3 paintings this week.  I'll post the other 2 soon so stay tuned...and I will admit, there is no time for perfection or reflection so whipping these out..they are what they are and normally I haven't done a lot of painting because I stress about it, taking my time and what not..these are not perfect but it's nice to have them up!)

Pick out a canvas, I purchased a thick 3 x 4 ft canvas at the local craft store that has really cheap canvases...I think this was just over $20.  

To start your song lyric canvas word art, find the lyrics to a song or poem that you really like and then use a photo editing program like picmonkey and add the lyrics/words line by line, editing each line to fit with the font you choose. Make sure you crop/size your template to scale of your canvas...since mine is 3x4 I made my template 3000 x 4000 pixels Here is what my finished template looked like...feel free to use it if you want, it is the lyrics of the song Happy As The Sun by Tyrone Wells (no I'm not OBSESSED but I do really like him and I liked these lyrics as I wanted a happy song that I could tell my husband and kids that it was about them).  
Photobucket

Take your finished template and upload it to a website like blockposters and select the size you want to print your image too and it will print your image onto the right amount of pages, blowing it up to the size you want.  now this isn't perfect...The template still ended up being a little bit bigger than my cnavas, which worked out since I had the thick canvas I just decided to wrap the words around the sides to make it fit without cutting any words out.  Print out the template and then trim all the pages and tape together.  Mine printed out onto 24 pages that I trimmed and taped together.
Photobucket

Now prep your canvas, if you want.  You could just paint the lyrics right onto the white canvas, but I didn't want mine to by stark white so I painted grey around the canvas, leaving some areas white...then after that was dry, I added a few washes of watered down white paint so there is subtle variation in the tone but nothing dramatic and it's not bright white.  
Photobucket

Take some sidewalk chalk (it wipes off easy without leaving the canvas dirty) and scribble the back of the top section of your template.
Photobucket

Lay it over the canvas, making sure it's straight and then use a pencil and trace over the letters to make a light transfer onto the canvas.  Now the chalk doesn't show up a TON but enough to make a guide so that the basic shape and spacing of the letters are consistent.   But to make sure I didn't mess it up or in case certain letters didn't show up well, I placed the template right below so I could also have a visual reference of what it was supposed to look like.
Photobucket

When I was done with one line, I would cut it off so the next line would by there, right below the line I was working on.  
Photobucket
Photobucket

Once you work through the first section, remove the template and scribble chalk on the next section and transfer...working your way down the canvas.
Photobucket
Photobucket

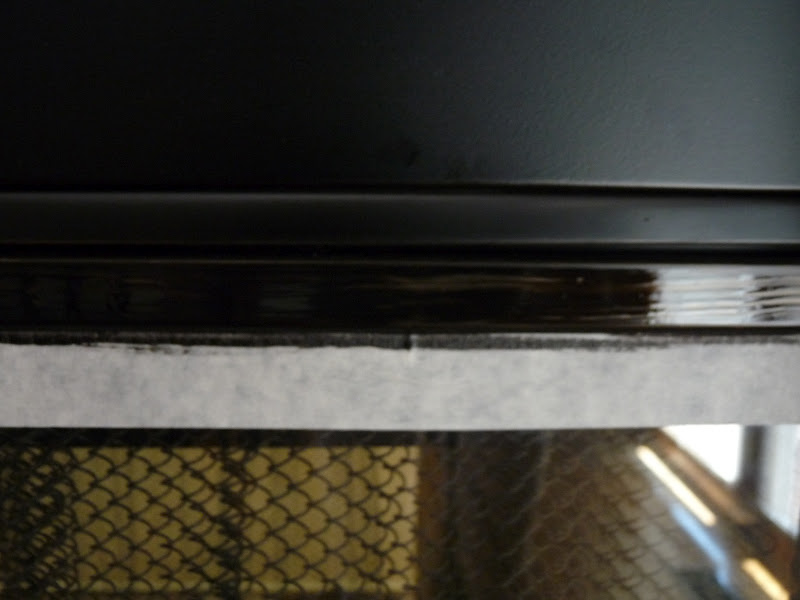
I used a small, flat edge paint brush and japanese sumi ink to paint on the lyrics.  I like the sumi ink because it flows on so nicely...I've painted words with paint before as well and you can use that if you want, but I just think the ink is much faster and flows better, especially for a more scripty font like I used.  
painted words, song lyrics, poem, canvas, art, words, script, painted words, song lyrics, poem, canvas, art, words, script

Once you are finished, make sure the ink/paint is totally dry, then you can wipe the canvas down with a cloth to get rid of all the excess chalk.  Then take some sand paper and lightly sand to your hearts content.  I didn't want the painting to be very bold and the black ink was so dark, bold and a bit shiny so I sanded away...and certain words that I wanted to pop out I sanded less.  Also, certain letters or words that were maybe a little messed up...I sanded those down a LOT which made the errors almost unnoticeable.  :)
painted words, song lyrics, poem, canvas, art, words, script, distressed

Now, Hang it up and enjoy!  I spent 1 morning on this, getting done just before it was time to feed the kids lunch...thankfully they were enjoying being friends and playing in the playroom without incident that morning otherwise this would have taken much longer.  
Photobucket


Tuesday, July 17, 2012

Cheap Easy Light Fixture Updates And Bathroom redo 2.0

Cheap Easy
Light Fixture Update
Photobucket

So The bathroom makeover I did wasn't quite finished when I posted the reveal....since then I painted the cabinet and the trim dark brown using Behr French Roast and it looked great.  I also used that Satin Acrylic Latex Enamel from the Fireplace Update and painted it on the gold hinges with my daughters small watercolor brush...so I wouldn't have to take the hinges off and repaint them!  and I FINALLY updated to gold light fixture...we were planning on buying a new light fixture we liked....only all the ones we liked were more than we wanted to pay so we hadn't done anything....until now...of course that we are selling the house...getting everything finished and polished for someone else to enjoy :(


bought oil rubbed bronze spray paint and just took the ugly gold fixture outside and gave it a spray and had the hubby put it back up.  We also spray painted the ugly gold fixture in the basement bathroom too and it's such a small, cheap thing to do but yet is a major improvement. The spray paint was $7 and I updated two light fixtures with it with more to spare...basic bathroom light fixtures start around $50 so this is definitely the best way to go unless you just feel like splurging on a light fixture...

Here is the basement light
Photobucket

And Here is the the final picture of the bathroom makeover that I never showed you with the cabinet and baseboards painted French Roast and the hinges painted black.

Photobucket


Monday, July 16, 2012

Quick DIY Fireplace Update

Quick Easy 
DIY Fireplace Update


I have been doing tons of projects big, small, tedious, creative...you name it!  This May was our 1 year anniversary of living here in our first home and just as we were really feeling settled and starting to know what we wanted to do decorating wise (it took me a long time)...a great opportunity came up and my hubby's job is taking us to Georgia.  Our house was in great shape when we moved in a year ago so you wouldn't think there would be much to do to get it ready to go on the market....but there is still a lot to do.  One of the first, simple updates I did was paint the gold trim on the fireplace.  Our realtor said she spray painted hers black and I could not believe how brave she was to spray paint inside her house!  But I loved the idea so I found Krylon Satin Back Acrylic Latex Enamel paint at Walmart in the spray paint section and painted it on with a foam brush and it turned out perfect...I am so sad I didn't do this sooner so I could have enjoyed it more before listing the house (which will happen sometime within the next week).  $4 well spent!!!
I've done a couple other simple updates and projects so stay tuned...I've learned my lesson and will do these simple things right away in our next house!  (ps...So sad to sell this house...we LOVE it).

Here is the BEFORE.....outdated gold metal trim....

Here's all you need
                                      

Tape off the glass and handles if needed.

Here's how the first coat looked...I had a moment of panic if it was going to turn out super crappy...

Here is the second coat...looking a bit better....don't worry it dries pretty fast..5-10 minutes between coats
 Here is the 3rd coat.....
 and after the 4th coat (for good measure)

This is AFTER

So much better right?


Thursday, July 12, 2012

Making Movies

Turn your tot into a producer!

Make your own movies easily and instantly on GoAnimate

Today we discovered GoAnimate, a website where you can sign up for free and quickly make animated movies.  I simply typed in the dialog my 5 year old daughter dictated to me. She also chose the scene, characters and which voices to use.  But I should warn you, it's addicting, you're kids will want to make more than one after they see their first video come to life!  But it was a great way to spend a muggy, stormy afternoon!  If you make a movie, please don't keep it to yourself, come on over and post it on my facebook page!

candacecreations's Animation by candacecreations on GoAnimate

Make a Video - Powered by GoAnimate.

candacecreations's Animation by candacecreations on GoAnimate

Animation Software - Powered by GoAnimate.


Monday, July 2, 2012

Summer Snapshots

Summer in Snapshot

Hey there!  This summer we have been keeping busy and blogging has taken a backseat to being outside and doing other fun activities with the kids so I think I'll be doing a few of these types of posts, sharing some snapshots from the past week!  As for activities, I've found so many fun ideas on Pinterest and the Play at Home Mom Blog.  All the bug/insect related craft activities were from LizzieJanes 20 Bug Craft Ideas and the rest can be found on my family activities board in pinterest including more we haven't done yet!  Things not pictured are many trips to various pools and splash pads, sprinkler fun, keeping J practicing her handwriting, riding bikes, laying around being lazy and watching cartoons, and eating lots of popscicles (in my mind I can hear my husband interject "you mean ICE POPS!" lol) - love the Breyers Real Fruit Popsicles in particular.  Watching fireworks, Nebraskans love fireworks!  We can hear a show going on almost every weekend and this week....every night there are tons going off.  Fireworks stands are not illegal here so every parking lot has a big tent and giant gorilla, dragon, t-rex, eagle, etc inflated next to it!  I can't even count how many are within 5 miles of our house.

 Hatched Bird Egg we found in the yard

 Colored Ice Blocks from Play at Home Mom. This is a favorite and I have more in the freezer to do this again!
 Stitching Board idea from play at home mom but used stiff felt and a real needle, gave her an assortment of buttons, beads, etc and it's an ongoing project she like to do a little more each day.
 Summer Soccer....it's hot, kids don't know what's going on but she loves it
 Introduced the kids to painting with stencils
Play till you drop, worn out from the spray park all morning