Showing posts with label toy. Show all posts

Thursday, April 1, 2010

Cake and Strawberries! Plus Cake Stand Tutorial!!!


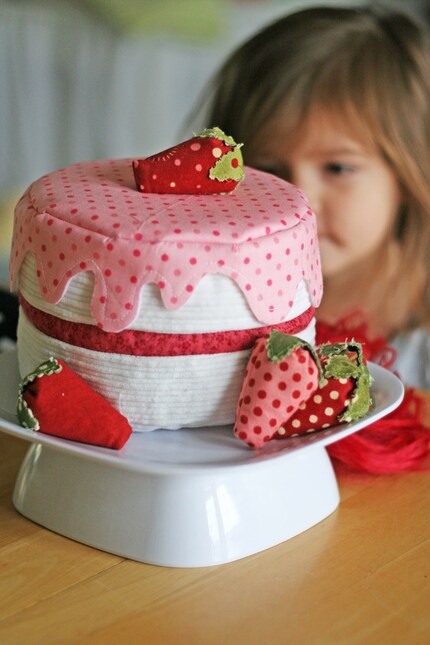
So I had previously posted a picture and a link to these adorable ideas I found through V & Co. featuring a strawberry shortcake and set of fabric strawberries. This was something on my to-do list that I ACTUALLY got done! I made these for one of my daughter's 3rd Birthday gifts. I used THIS free tutorial for the fabric strawberries and could have bought the tutorial for the cake HERE, but I was too cheap and just stared at the picture instead and decided to figure it out. If you decide to make this cake, maybe buy the tutorial...you'll save yourself some time and frustration. Mine is REALLY "fudged" but with the frosting on it looks decent. I decided to make my frosting reversible so my daughter could have strawberry shortcake or a lemon cake! Anyways, it was a hit! She has really been enjoying this play set, and it goes perfectly with her new tea set! I also made the cake stand, it only took about 10 minutes...if you include waiting for the glue gun to heat up! My daughter loves switching the frosting around and piling on the strawberries....then pretending to take a great big bite right out of the cake!

Fabric Strawberries
I found the little yellow basket for the strawberries in the Easter Section at Hobby Lobby for 50 cents! I thought it was PERFECT!

Strawberry Shortcake


Lemon Cake


Super Easy Cake Stand Tutorial


To make the play wooden cake stand, here is what you'll need:

glue gun
foam brush
acrylic craft paint
wooden candle stick
wooden circle-
(found mine near clock making supplies at the craft store)

Pull out the metal thing that holds the candle. (my husband used a butter knife to pry it out).

Decide which way you want to use the candle stick, I actually used mine upside down, it looked better f0r the cake plate design.

Heat up your glue gun.

Find the center of you wooden disc/circle

Apply hot glue to the end of the candle stick and carefully aligned and attatch to center of wooden disc.

Using your foam brush, paint an even coat of craft paint. That will quickly dry and you can do a second coat if needed.

THE END!

And if you need a real cupcake stand that can be thrown together in a jiffy and on the cheap, check out my super easy, frugal cupcake stand tutorial.


Another great bargain seen here? I got that dress my daughter is wearing last year from Gymboree on Clearance for under $10, it was originally around $40. I bought the next size up and now it fits her perfect for this spring/summer season! I LOVE getting a good deal!

Monday, March 22, 2010

May Contain Lead? CRAP!


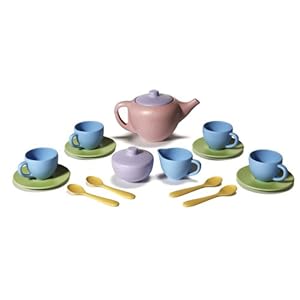
My daughter LOVES to play with her tea set and host tea parties. She received an adorable tin tea set by Schylling a little over a year ago and has used it so much. However, my daughter doesn't like to just pretend, she likes my to put a bit of water in the tea pot so she can pour it into her tea cups and drink it. I didn't think much of it...then my husband noticed the inside of her tea pot was started to get a bit rusted, that can't be healthy. One thing lead to another and I was looking at her exact tea set on Amazon and it said a warning that the product may contain lead or produce lead dust. YIKES! Well, I just tried to find it again and now I don't see that same warning, however, in the meantime, I spent tons of time combing the internet trying to find a replacement set that actually advertised as being SAFE to drink out of. It was actually really hard, so I pretty much decided to rule out anything made in China and eventually found this BPA and Phlatelate Free Tea Pot Set made by Green Toys.
So this will be her replacement set. It's made from is 100% recycled material and is actually advertised as being non toxic and safe for children to drink and eat out of...This was the only set I could find that clearly stated this. It's not AS cute as some of the other tea sets out there, but at least I know it's safe. I'm not ussually crazy about checking these things, but when it comes to toys that are constantly being put in your kids mouth, you want to be careful! I can actually feel good about this set as well as it's environmentally friendly...which is something I've been trying to work on more since joining the One Small Change Challenge.

If your little one loves tea parties or you are trying to think of a gift for a little girl, I would definitely recommend this tea set, it's durable, safe to play with and drink with, totally non-toxic, made in the USA, and helps the environment. And unlike some "green toys" that tend to be more boring to look at, this tea set is still colorful and cheerful.

Some of my other favorite safe toys are

Vulli Sophie the Giraffe Teether
Green Toys Dump TruckGreen Toys Tool SetPlanToys Dancing AlligatorPrince Lionheart Wheely Bug, Bug, Smallgreen sprouts Ring Cool Soothing Teethergreen sprouts Teether KeysPlanToys 50 Construction Set

Monday, March 15, 2010

Double Sided Puzzle


I thought I had a good idea when I started saving cereal boxes to use for making puzzles. My plan is to modge podge some pictures my daughter would like and then cut up into puzzle pieces. Well, I just received this in the mail from my Mother-in-Law the other day. She was having a similar idea and recycled an old calender and made this cute double sided puzzle for my daughter! She used the front cover of the calendar, which had a picture on both sides, cut it up and then covered both sides in contact paper! It looks really great and we just store all the piece in a ziploc baggy. Another great way to reuse what you have lying around the house into free new things for your child to play with!

Thursday, March 11, 2010

Wooden Memory Game - Tutorial


Looking for an easy project to do today???

Remember playing the game "memory" as a kid? Heck, you might even still play it now! Well, I was trying to think of some education toys for my daughter who will be 3 in a couple of weeks. I was browsing Amazon and came across this cute wooden memory game set.


Of course when I saw these, I thought about making my own! So I headed to good old HobLob so conveniently just around the corner and picked up some wooden cards (very inexpensive)! Then I had a thrifty day at Micheal's earlier this week, all the $1 bin items were on special 2 for $1. So I picked up a pad of coordinating papers for 50 cents. The rest of what I needed I had at home in my pile of crap in the corner of the dining room craft room.

Here is the awesome tutorial so simple you don't really need one for making your own set of wooden memory cards!


WHAT YOU NEED
images for the cards
wooden cards
coordinating set of decorative papers

contrasting paper

modge podge

foam brush
scissors

paper plate


Google search "animal clipart" "animal silhouettes" or just use basic shape...depending on what your theme is. You could use insect silhouettes, construction equiptment, vehicles, their favorite cartoon characters...whatever!

Print out your selected images and cut them out.

Trace your images onto the back of your decorative paper and then cut out. Repeat, making two of each image.

Using a contrasting decorative paper, cut out rectangles just smaller than the wooden card for a backdrop. I had 12 cards so I needed 12 rectangles.

Using a foam Brush, apply a layer of modge podge to the entire surface of your wooden card. Carefully line up your paper rectangle and press down. Set aside to dry and repeat until all cards are done.


Starting with the dry wooden cards, apply a second layer of modge podge over the paper rectangle that is now dried to the wooden card. Line up your animal silhouette (or whatever image you are using), press down and smooth out using your foam brush. Brush a layer of modge podge over top of the entire card and set aside to dry. Repeat to complete all cards.


Allow your set of wooden cards to dry completely. Then wrap as a gift or start playing with the kids!


This would make a great little handmade gift for boys or girls! Need something cute for their Easter Basket???


A Classic Game for exercising the memory! Let the family fun begin!

Monday, March 8, 2010

Fabric Strawberries & Strawberry Shortcake!


So my (almost) 3 year is loving her new (to her) white wooden play table that I found on Craigslist. Ever since we got it, she has been hosting daily tea parties for her 3 my little ponies and 1 or 2 monkey friends for the past few weeks. Her birthday is coming up at the end of the month and even though I have an idea of what we will get her for a gift, I keep thinking I would love to get her a play cake set or play cupcake set for her tea parties, possibly something I could make. As of right now, she serves plastic crackers as snacks.
Well, I just came across these ADORABLE fabric strawberries (click for free tutorial) and strawberry shortcake with removable frosting through one of my favorite blogs V and Co.


Is this not the cutest???!! I'm so planning on making these for one of her birthday presents! The To-Do List just got a little bit longer! ;)

Sunday, February 28, 2010

Milk Jug Bath Toy Scoop


Reduce.Reuse.Recycle.....Here is a great way to recycle and reuse that milk jug you just finished up! Simply cut the top off like this......


Then poke some holes in the bottom like this.....


And now you have a super useful toy scoop for picking up all those toys in the bathtub and keeping them from getting mildewy! Some things are just TOO easy not to do! I saw this in my most recent issue of Family Fun magazine and it works great! It makes for a fun bath toy too as my daughter likes to use it like a net to catch her toys while in the tub...and she likes when I fill it with water and let it "rain" over her. And to think I almost BOUGHT a turtle bath toy scoop at the store the other day!!!

Wednesday, February 17, 2010

Play Wallet


Here's the wallet I made to go with the soft play purse I made for my daughter. She loves it. You can see in the second picture, I printed off some play money that I found with google image search, and made a drivers license with her picture on it and glued it to card stock. I also threw in a couple of old gift cards that look like credit cards. She likes to put her toy cell phone in the purse and her plane ticket from our travels over the holidays.
I didn't take pics along the way for a tutorial because I didn't know if this was going to turn out! I was just making it up and, as my MIL would say "fudged it". It was a good way to use up the leftover fabric scraps from the toddler purse!

However, if you like the matching fabric play purse that goes with it, you can check out the tutorial HERE or Here.

Sunday, January 31, 2010

More Projects for the TO-DO List

T-shirt to Newborn Gown

Okay so I keep finding all these cool baby projects that I want to do for my little guy before he arrives in April. I'm still deciding on fabric for the carseat cover, which I went to Joanns today and after looking at Heather Bailey fabric, nothing stood out at the store. I did see 2 cute prints at Hobby Lobby so I'm keeping those in mind.

I found this free tutorial for making Newborn Gowns out of T-shirts and think it looks easy enough! I've been looking at baby boy stuff and it's not nearly as fun as the girl stuff...but with projects like this, you can really get creative! Now I just need to find some cool T-shirts! This pattern would also work with fabric from the store too...How do people come up with these great projects!?!? I love it!

Anyways, here's the newest baby project added to my To-Do List! I also think this would make a great baby gift. I have some a friend due in a couple weeks and her husband is a huge Cowboys fan so I'm thinking of making one out of a Cowboys T-shirt for them.


Tutorial: T-shirt to Newborn Gown

by thismamamakesstuff.com


Scrappy Monster Toy


The NEXT little project I came across is this SCRAPPY MONSTER over on MADE.

What a cute little addition to add to a baby gift which can then be used as one of those little toys you hang on the carseat handle to entertain the baby! This is just a super simple, cute idea that can be made with random fabric scraps...hooray! isn't everybody looking for cute little projects to use up those scraps? This project reminds me of the Monster I made my nephew a few posts back.

Crochet Baby Hat with Brim


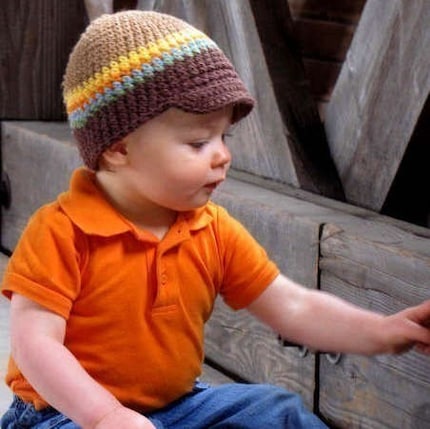
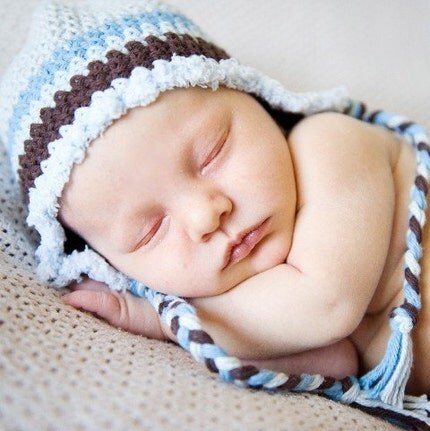
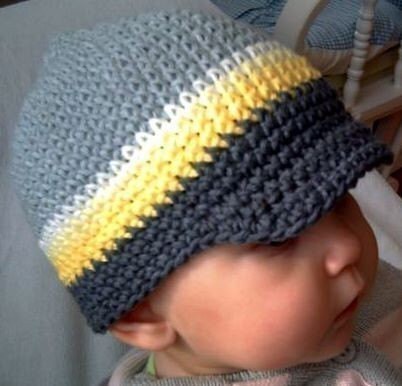
Next thing I love is this crochet baby boy hat found on this Etsy shop. However, I don't crochet so I might have to buy one of these. But aren't they just adorable?