Thursday, October 18, 2012

Gluten Free Peanut Butter Chocolate Chip Pancakes

Easy Gluten Free Breakfast
Gluten Free Peanut Butter Chocolate Chip Pancakes

Photobucket

Eating Gluten Free and Dairy Free can be a big chore most of the time, it involves a lot of baking and cooking from scratch so it's nice to be able to have short cuts once in a while!  That's why I love the GF DF pancakes at Trader Joes!  They are inexpensive and you just pop them in the toaster and you've got pancakes!  I do have a great pancake recipe that I make often as well that is great but for those mornings I don't feel like making pancakes all morning or before bed and I need a little sweet snack...this is a good fix!

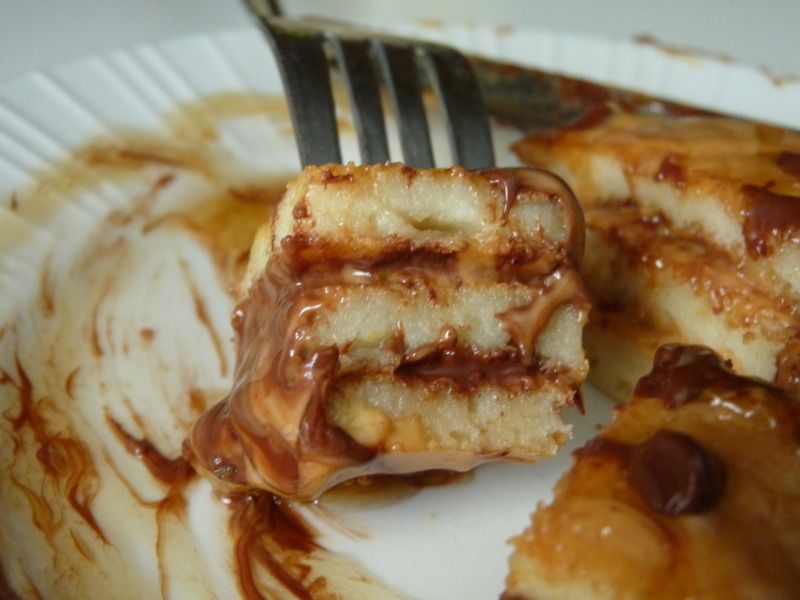
The frozen Trader Joes gluten free pancakes come in packages of 3 so what I like to do is just pop all 3 in the toaster and when they pop up, I spread the first one with peanut butter and sprinkle on some mini chocolate chips, add the 2nd pancake and add another layer of peanut butter and chocolate chips and then add the 3rd pancake with a little more peanut butter and real maple syrup.  It is soooooo yummy!

Photobucket

The mini chocolate chips melt between the pancake layers and mix with the peanut butter and syrup in the best possible way!
Photobucket

Yes.....I have an obsession with chocolate and peanut butter.......

Monday, September 24, 2012

Homeschool, so far...

Hello!  Yes I haven't quit my blog although it may have appeared that way. Our hard drive crashed on our laptop and I have a hard time blogging on the ipad or iphone, but sometimes my hubby leaves his work laptop at home so here's an update of what we have been up to the past month.  We started homeschooling my 5 year old girl and it has been so much fun, we are really enjoying it and I don't know what I was so nervous/worried about when trying to make the final decision to do it.  Most of all, she is so happy and loves it too.  Anyways, I still have a lot to learn but right now I really like Charlotte Mason and Montessori style of learning...haven't bought a curriculum but am kind of making one as we go. I do read all the posts from Free Your Kids on Facebook but I just don't know if I could let go and trust the whole "unschooling" method although it is interesting to read what people say about it. One website that has been really useful is 1+1+1=1.  I picked up a laminator and we are doing the You Can Read printables to learn and practice site words and she has a lot of fun with it.  We also printed out the Angry Birds theme pack that helps introduce money, fractions, greater than/less than, and other math skills.  And I've also made a tot book and some other montesorri printabes for my 2 year old and put it in his mickey mouse binder so he gets all "I want MY school work!" and has fun with it too.  I also made her some easy reader books after I saw the BOB books but thought she would be more interested if it was personal to her.  I made one about the zoo and drew simple pictures and then I made 2 other books and had her draw the illustrations.  I also read to her a lot, we have read a few of the Ramona books by Beverly Cleary, we love them! and at the moment are halfway through the Secret Garden.  I usually have her sketch in her notebook while I read, it helps her sit still and she seems to retain more and usually ends up drawing scenes that I'm reading and trying to write names of characters.  Before I had her draw, she would be listening, but also constantly moving around, looking at herself in the mirror and interrupting...the drawing though made a huge difference.

I also picked up all sorts of kindergarten-1 workbooks at an educational supply store we happened to stuble upon in St. Louis (our first week of homeschool was a road trip from Omaha to Alpharetta, GA.  We stopped in St. Louis both ways and spent a weekend in Nashville on the way down.)

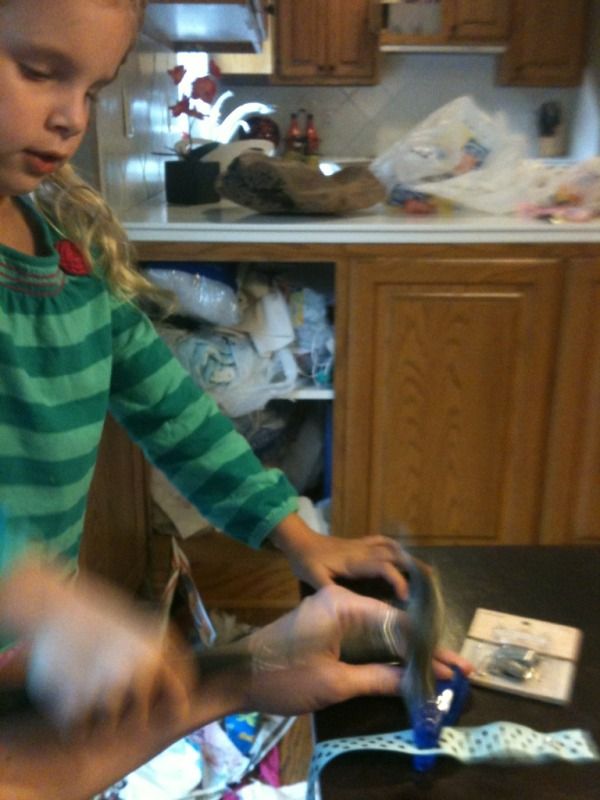
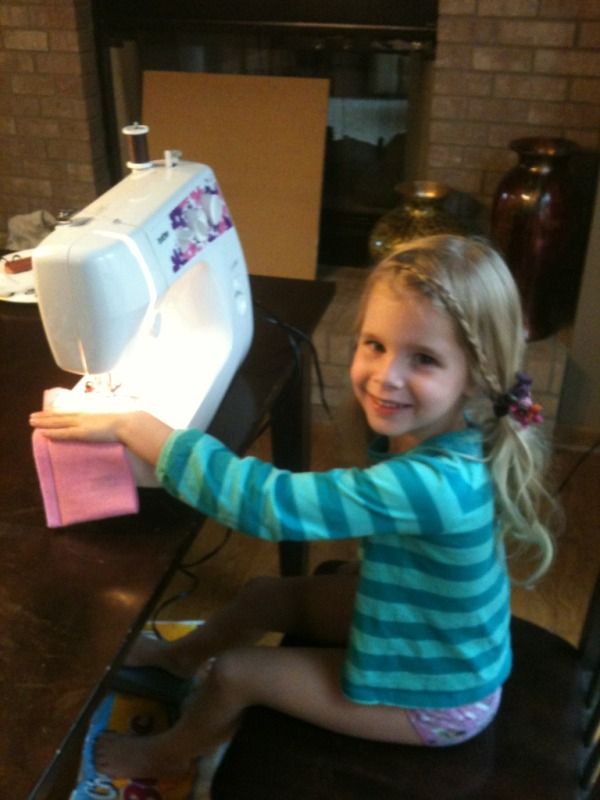
Aside from working on reading, math and doing science experiments, Some of the things J has learned to do is make scrambled eggs and french toast, vaccuum and sweep and today she wanted to learn how to sew.  She has started asking lately if I thought Santa could bring her a kid sewing machine, but wasn't sure if there was such a thing. So today she gor her wish and first started out by helping me make some binkie clips as you can see here she is hammering the snaps in place
Uploaded from the Photobucket iPhone App
Ever have that dream you are at school and realize you forgot to wear pants? well, no biggie

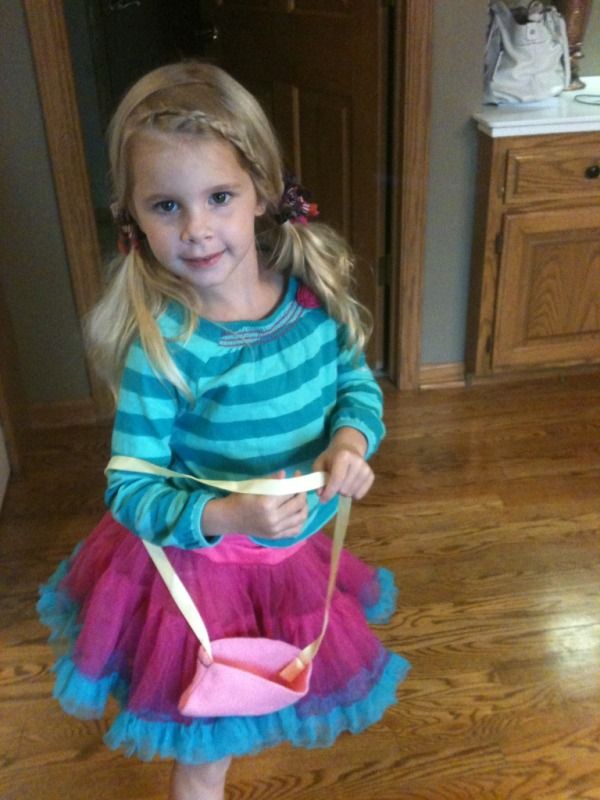
Then she used some scraps and she made herself a little purse and then a bag for her brother.  She did awesome, I was sitting right next to her to instruct and would reach over and help her stay on the fabric if it started to get crooked but really, I didn't have to touch too much.  She was so excited and eager to learn, she really paid attention to what I told her and implemented it.  You can see in her face how excited she is
Uploaded from the Photobucket iPhone App
Ever have that dream you are at school with no pants on? No biggie

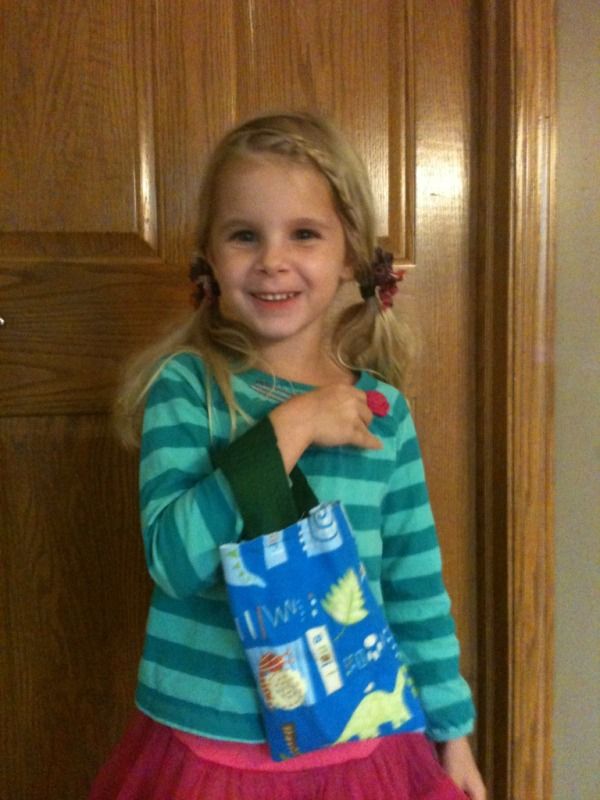
And here she is modelling her AWESOME purse
Uploaded from the Photobucket iPhone App
and the bag for her brother
Uploaded from the Photobucket iPhone App
Then she told me she wanted to sew a book.  I tried to think of something else but she insisted...like a soft kid book so I remembered I had some cream polar fleece scraps so I cut some rectangles and stacked them up and had her sew a seam down the middle.  Then she sewed a zigzag stitch border around each page (6 of them) and that is where we left off...

We spend plenty of time outside and learn about nature
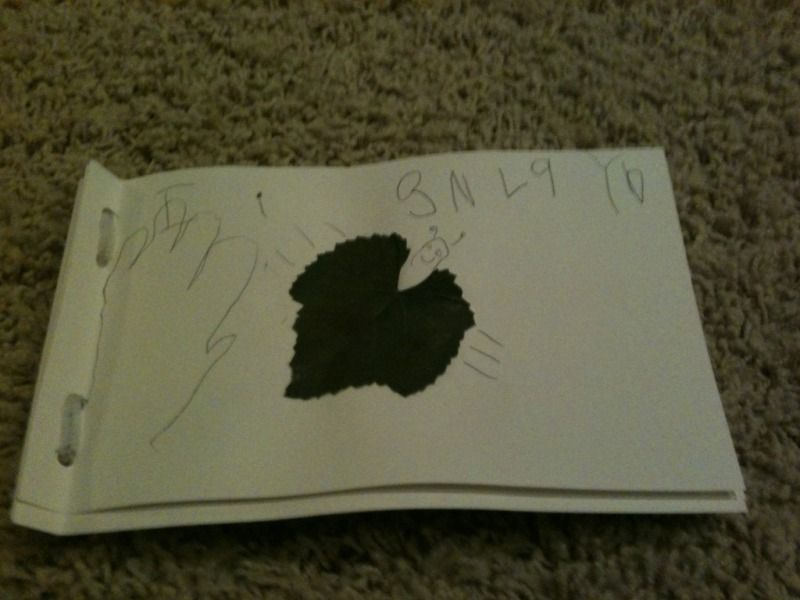
Here is a nature journal she made from collecting leaves in the backyard.  She glued them into the book then drew around them turning each leaf into an animal or insect.
Uploaded from the Photobucket iPhone App
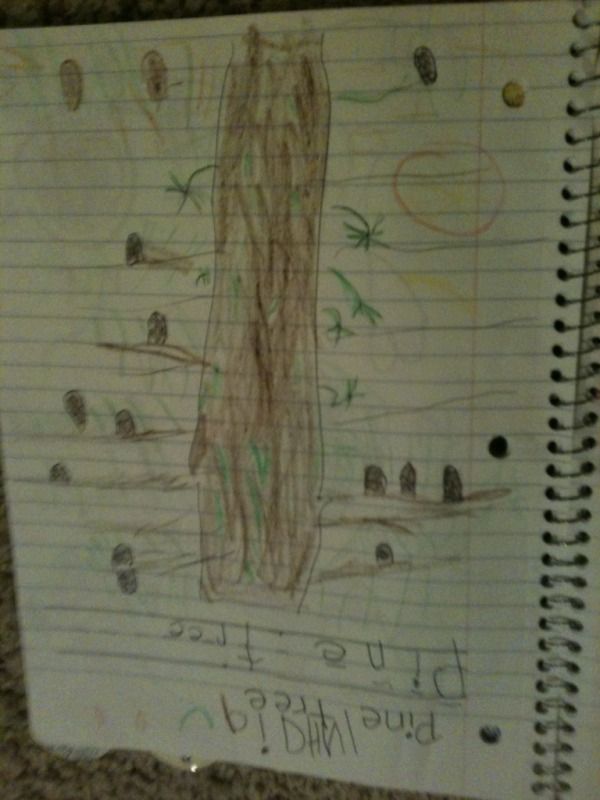
Here is a page from her notebook from when we were in Georgia surrounded by pine trees.  We went for a walk and she collected pine cones and pine needles and studied what the pine trees looked like and later drew this picture
Uploaded from the Photobucket iPhone App

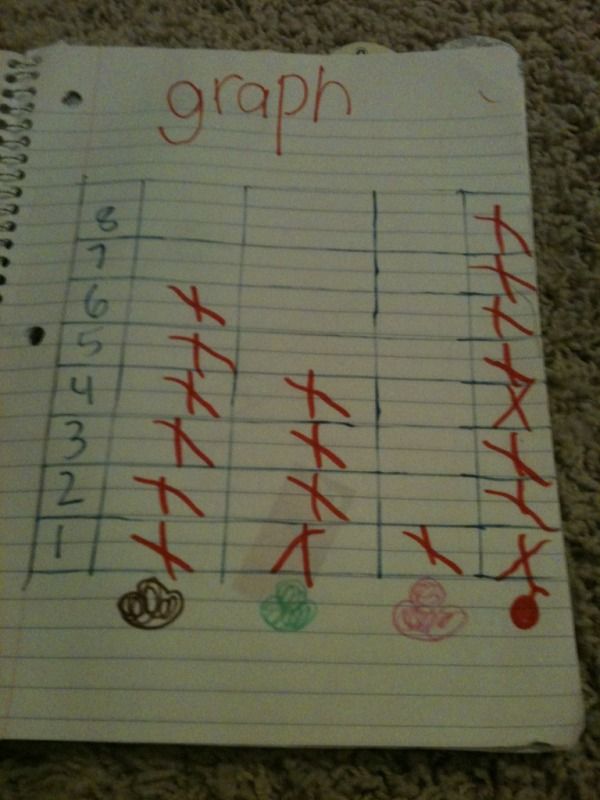
Learning about making and reading graphs we used the ice cream spinner from the fancy nancy ice cream game
Uploaded from the Photobucket iPhone App

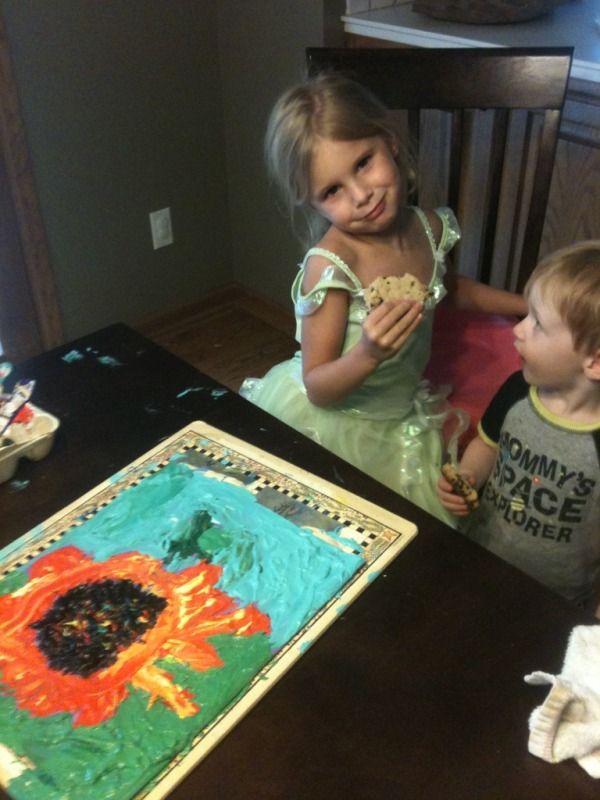
And for my favorite subject...ART I have been introducing her to artists and then doing an art project inspire by that artist.  The first one was Van Gogh...and she will never forget...she made a little chant about him...Van Gogh the Weirdo cut his own ear he painted impasto....and fyi she says she will NEVER marry Van Gogh...she didn't even like talking about him or looking at his art until the next day I pulled out some examples of his sunflower still lifes and then in an old egg carton mixed tempura paint with flour and had her paint a sunflour with a popscicle stick to recreate the style of Van Gogh.  It was amazing she went from hating him to appreciating him.
Uploaded from the Photobucket iPhone App

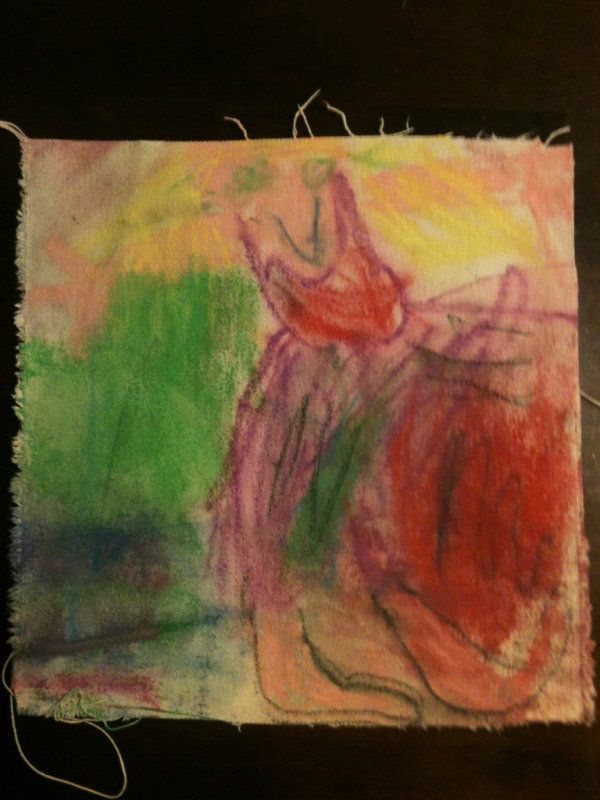
I decided to stick with impressionists for now so the next artist I introduced her to was Edgar Degas.  To help her remember we just say 'Degas painted Dancers".  She liked his art too but wasn't as excited about her Degas style painting technique as the Van Gogh...I think it was probably just bad timing, she wasn't really in a good mood and I probably should have saved it for another time so she would have appreciated it more but her dancer still turned out great.  We soaked canvas in milk and then she made the picture with chalk pastel, then we flipped it over and ironed the back to set the pastels in.
09E485CC-3B2A-4365-BA1E-C5B301773859-1978-00000329251A6E24_zps036b8e8d, Uploaded from the Photobucket iPhone App
I have a rule that I picked up when I worked at at Monart school...never touch a child's artwork.  I will sit at the table with her and talk to her about what she is doing and have a scrap piece of paper so I can demonstrate how to draw something or any new technique, but I never put my hands on her art and she has become very proud of that and protective of that.  Kids want to look at their finished product at the end and know they did it themselves.  AND sometimes when they don't do it "right" it ends up being better and I would hate to miss out on seeing how hers turns out.


The ideas for these two painting projects came from this AWESOME I picked up when I was still in college

Discovering Great Artists: Hands-On Art for Children in the Styles of the Great Masters 


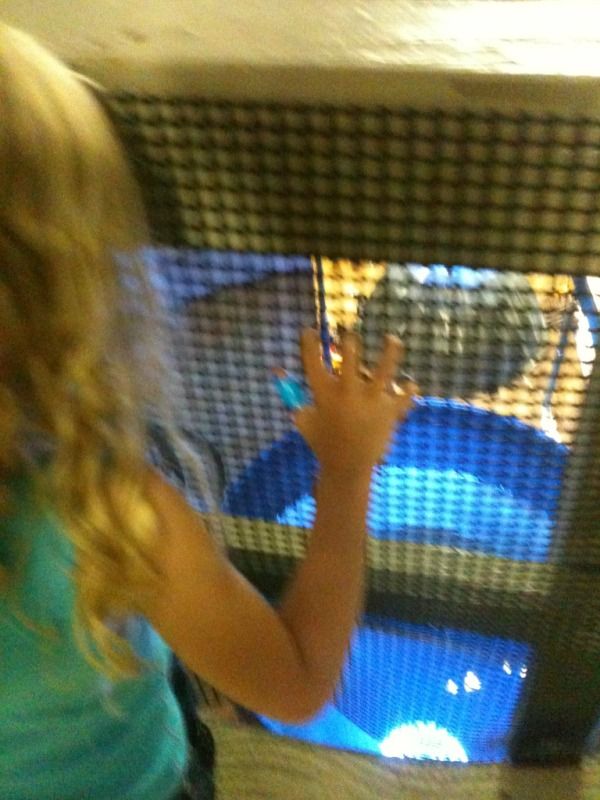
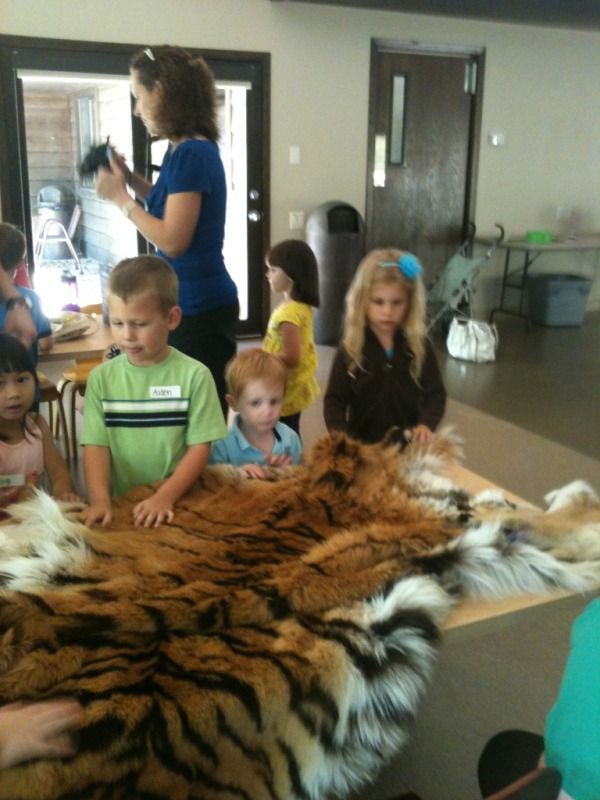
We also take advantage of our zoo membership.  Last week we went to a homeschool workshop that was all about habitats and they also took us behind the scenes of the shark tank which was a little scary since with all those little people and nothing really to stop your from falling in...let me just say that it was cool but I also was annoying the crap out of Jordan making her hold my hand and constantly pulling her back...but there were all these little boys who were active and curious and oblivious and NOT anywhere near their moms and I could just see her getting bumped into the tank!  Apparently that is not normally part of the workshop but it was a rare occasion they decided to take us up there...and like I said, it was definitely cool, but also a little nerve wracking. 
Uploaded from the Photobucket iPhone App
well at least we didn't have to worry about falling down into the jelly fish tanks^
Uploaded from the Photobucket iPhone App

Oh and of course she still has playdates with friends, goes to AWANA and MOPPETS and pretty much makes friends wherever she goes.  In Georgia, she learned how to braid pipe cleaners in the hotel room. She made so many of them then took the to the park and gave them all away to either elderly people or other little girls and ended up making a bunch of friends that we'll be able to call after we move.

Saturday, September 8, 2012

scrappy saturday

hi guys! so after we got back from our road trip to Georgia (seeing St.louis and Nashville ) I got home and found our computer had crashed. it is totally dead so between trying to sell our house and starting homeschooling and having a broken computer, blogging isn't very easy. And I actually have some things I have wanted to blog about and share but I can't get the pictures from my camera onto my iPhone but wanted to try and at least keep up with the link up.

since blogging is such a pain on the iPad or iPhone I will be pinning the feature links rather than posting on here.

thanks for coming back and sharing!


Sunday, August 19, 2012

Thee Networking Blog Hop!


Are you ready to network??

Are you prepared to make some new bloggy friends??

Well, here's your chance!

Saturday, August 18, 2012

Scrappy Saturday

Scrappy Saturday

DRUMROLL PLEASE! I HAVE AN ANNOUNCEMENT TO MAKE
Don't forget to come back starting TONIGHT at midnight for 
THEE NETWORKING BLOGHOP
You get to Link up your BLOG, not just a recent post :)
  Photobucket

As far as last weekend, there were so many great posts! Here are a few of them


Friday, August 10, 2012

Scrappy Saturday

Scrappy Saturday

Welcome to this weeks link party!  Hope you link up, look around and have a great weekend!  Also don't forget about the BIG LINK UP coming up August 19, you won't want to miss it!
  Photobucket

Here a couple of the many great links from last week


1. Scrappy Owl by Solar Montana Creations
2. Planting Succulent Gardens by Ellens Creative Passage
3. Stenciled Carpet by Cocalores
4. Tshirt to Trendy Summer Top by Domesticated Princess


Now link up your awesome projects using scraps (of any kind), upcycling, redo/makeovers, and anything you made including materials you found or had on hand.  We love thrifty, resourceful creativity!

if you like this linky/blog you can follow me on GFC, Facebook, Twitter, Pinterest or vote for me on Top Mommy Blogs...:)

Visit some of the other links and leave some comment love :)

No Giveaways

grab a button and post it with your other linky lists por favor ;)


Monday, August 6, 2012

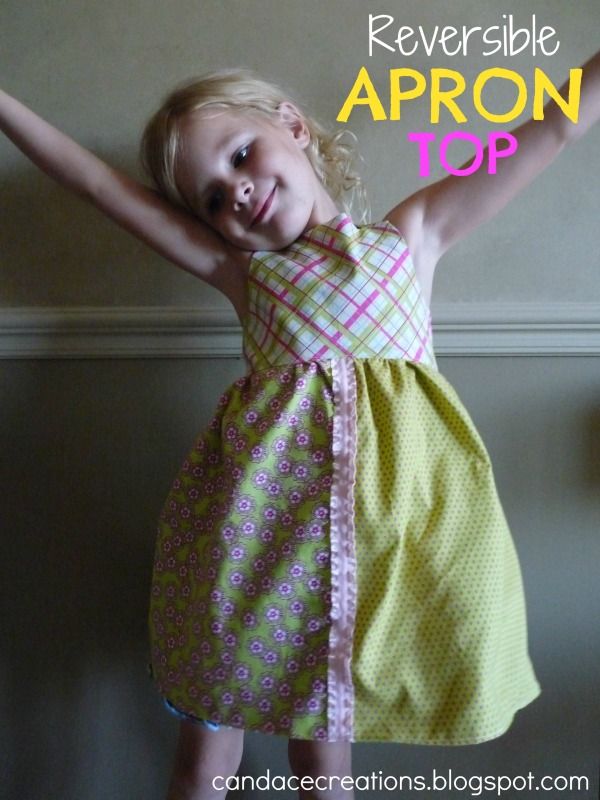
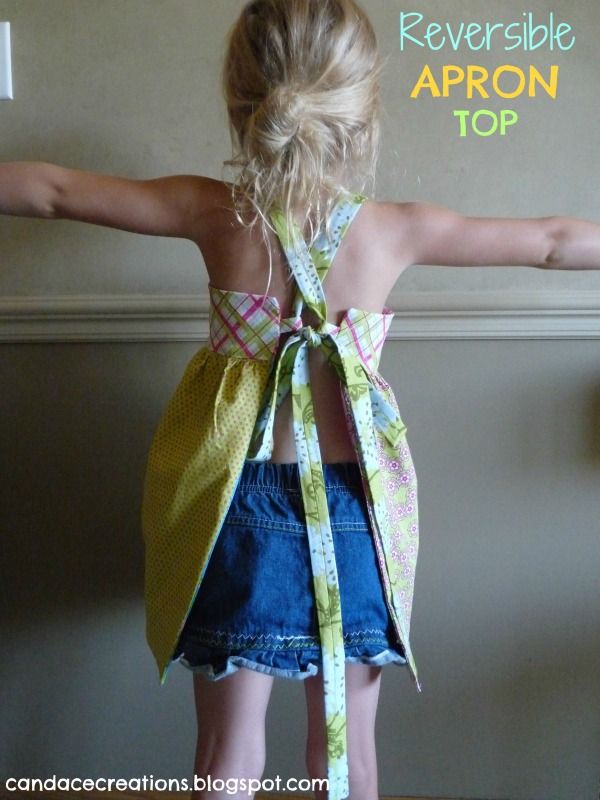
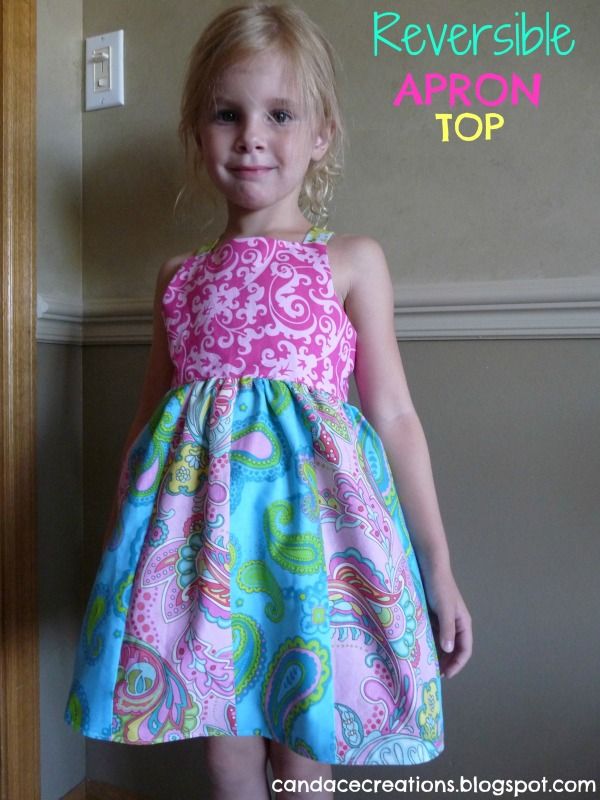
Pinterest Challenge - Reversible Apron Dress

REVERSIBLE APRON DRESS

Well, selling our house has been slow going so far so I need to keep myself busy so I don't stress out about it.  Last night I started thinking about painting the kitchen backsplash to give it a faux finish stone look...you know...trying to feel in control of getting the house to sell quickly (not desperate it's only been 2.5 weeks, but who wants it to drag on right?)  Anyways, to keep myself from a possible disaster I decided to take the Pinterest Challenge today instead and make the Reversible Apron Dress I pinned from Scattered Thoughts of a Crafty Mom.  I bought the fabric a while ago and have been meaning to do it...so today was the day!  Once my little guy went down for his afternoon nap, I went to work on it, it came together rather easily and my piece of junk sewing machine actually didn't give me much to complain about.  My daughter had fun cutting fabric scraps and pretending she was making the same top for her doll.  Here is the final result (I would have taken pictures outside for better lighting but it's 100 out there and J had no interest .)  Anyways, I love how it turned out, as this is only my 3rd attempt at sewing clothing for children (2 Rapunzel dresses...one for J and one for my niece) and they were not perfect....this Apron Top was so easy, nothing went wrong and I am sooo happy about that (especially because did I mention I have the most annoying sewing machine ever???)

Anyways...Here it is


Wanna Try it?  

Check out the PIN HERE!


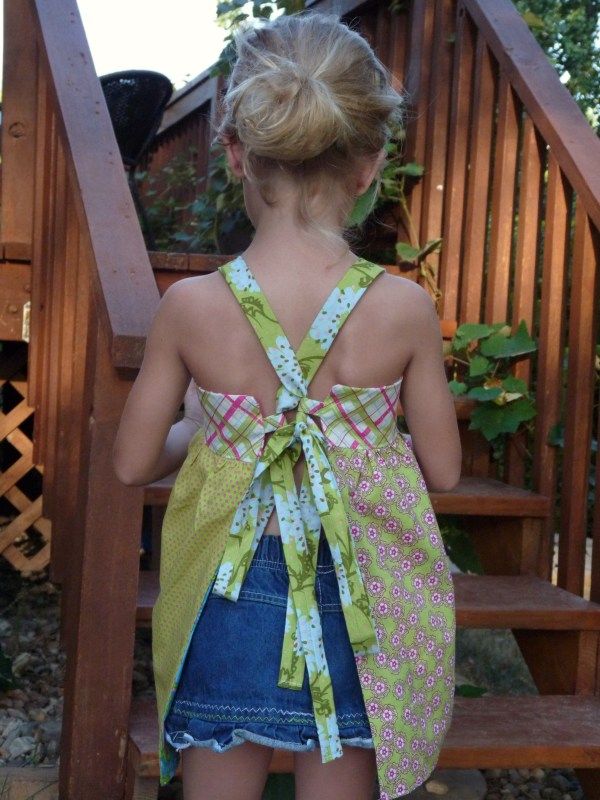
Here are a couple pics outside with better light with the green side.

Yes it's been so hot and dry for so long...everything is dying even though we water it.


Friday, August 3, 2012

Scrappy Saturday

Scrappy Saturdays


Hey'a!  hope you are all staying cool!  I loved all the links last week and can't wait to see what you've got for me this week!

Remember, August 19 I will be one of the co-hosts of the One Day Once a Month Thee Networking Blog Hop hosted by Kelly at Live Laugh Rowe

Mark Your Calendars and grab the button for your side bar as a little reminder if you like! :)  The more the merrier!
Photobucket


Last weeks featured posts
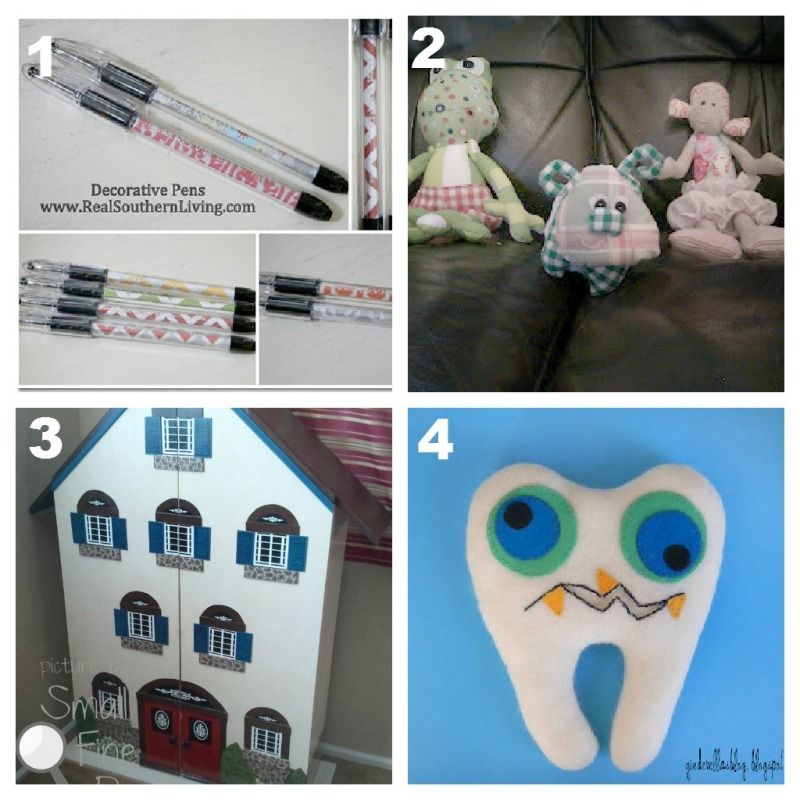
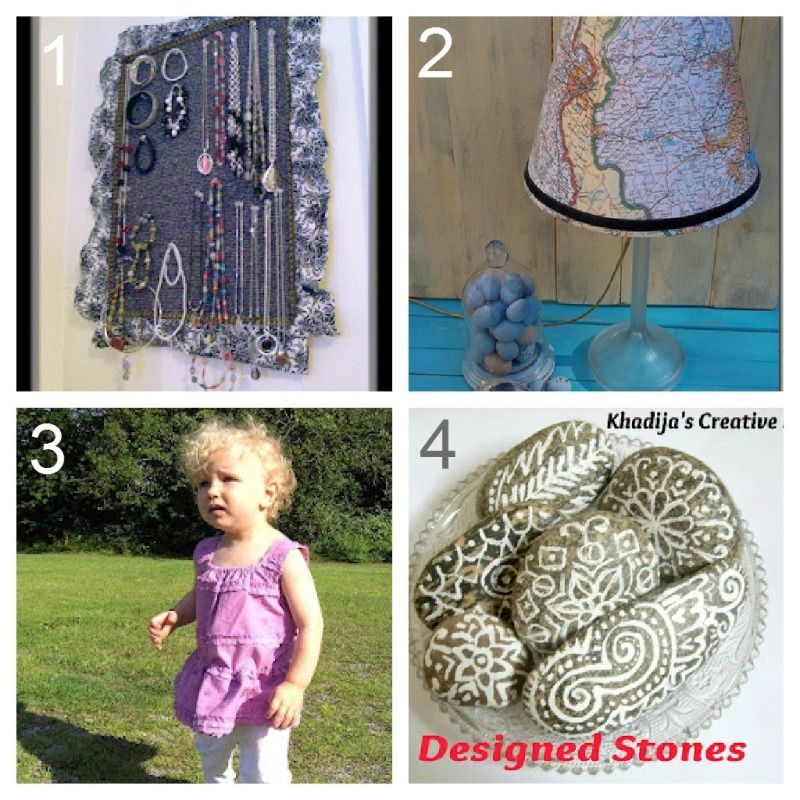
1. Chronic Christian Crafter - Jewelry Organizer from Free Yard Sale Find
2. Ellens Creative Passage - Map Lamp Shade
3. Wessens Art - Tutorial Little Girls Blouse
4. Khadija's Creative Mind - DIY Designed Stones Art


Now link up your awesome projects using scraps (of any kind), upcycling, redo/makeovers, and anything you made including materials you found or had on hand.  We love thrifty, resourceful creativity!

if you like this linky/blog you can follow me on GFC, Facebook, Twitter, Pinterest or vote for me on Top Mommy Blogs...:)

Visit some of the other links and leave some comment love :)

No Giveaways

grab a button and post it with your other linky lists por favor ;)


Thursday, August 2, 2012

Chalkboard Pedestal Table Makeover

Chalkboard Pedestal Table Makeover


So about 2 weeks ago I was driving to the dollar store and as I drove past the thrift store in the same strip mall, they had this octagon pedestal table out on the sidewalk.  I decided we hadn't looked there in a while so we stopped and I walked up to the pedestal table and saw that it was marked down from $10 to FREE.  Suddenly I hear Jordan squealing because she found a princess scooter parked out front too and has been wanting one for a long time.  It was a whopping $2.98.  So we got the princess scooter and I heaved that pedestal table quickly into the trunk of the minivan (yes I love having a minivan now...never say never!!!)  I didn't look at it more than a few seconds, long enough to see it was free and so I just grabbed it, we were in a hurry.  Later, I realized the table was pretty gross looking, but kept it in the back of the van for the rest of the week (I couldn't get it out myself this thing is SOLID and HEAVY!)


When My husband finally saw it, he was like what in the world!?!? Why is my wife driving around with this nasty disgusting table in the back of her van all week?  We were all together in the van that weekend and I didn't know what to do with it and we are already busy trying to sell our house...so I said "fine lets just drop it back off at the curb on the way home...but when we got close...I couldn't do it and said "give me a week to figure out what to do with it and if I don't know we'll dump it back off".


When I FINALLY took the pedestal table out of the minivan, I knew even LESS what to do with it at first...I had originally thought it could go in the dining room with a vase of flowers since we have no table and it's pretty empty, I was thinking to paint it with the dark espresso paint we used on the cabinetry in the bathroom.  But once I stood next to this octagonal pedestal table, I realized it was not only disgusting and filthy, it was a really weird height...too tall for a coffee table...too short for any adult to sit at.  I also realized the top swivels around.  What in the world was this table EVER used for?  I thought okay, well I have to take it back, no wonder it was free....it's the weirdest table ever!  And went inside.

Let's spin it around to a new spot

Later, when I was in the garage with my daughter riding her scooter, I realized the table was a great height for kids and decided to keep it and make it into a fun activity table.  I've been wanting to try a chalkboard paint project for a long time so this was my chance.  A gave the table a good soapy wash down and lightly sanded the table top but not the base.  I let my daughter pick out the spray paint for the base of the pedestal table ( After I told her no pink or purple...)  I even let her help roll the chalkboard paint on the top!  It was a pretty simple project, did a quick coat of spray primer BIN 123 (i think it's called) all over.  Then spray painted the base turquoise which took no time at all.  And got a good enough covering in 1 coat with 1 can.  The next day I taped around the edges of the table top and we just rolled on our Rustoleum Chalkboard Paint and repeated 2-3 times throughout the day...but each coat only took 5 minutes to roll on with a foam roller.  So, I'd say the most effort put into this free pedestal table was getting the heavy ol' thing into the back of my car MYSELF!  I noticed people driving by slowly, watching me struggle probably either laughing or contemplating helping me before I broke my back but I managed.


The kids L-O-V-E their new pedestal chalkboard table!  We put it in the den in our basement so the lighting isn't great in the pictures but it's a good spot for it.  The kids love drawing in one spot, then spinning the top around to get to a fresh spot and then wiping it down with rags when they want to start fresh.  I put some sidewalk chalk in these cute little metal buckets I had picked up at the $1 section at Target for them to use.


J was drawing Caillou and his family for B...he kept asking someone to draw Caillou...Rosie, Cat...Caillou mommy and Caillou Daddy and J was more than happy to meet his request.


Friday, July 27, 2012

Scrappy Saturday

Scrappy Saturday 

YES! Scrappy Saturday is back after a 3 week hiatus!  Things have just been so crazy this past month it took my a while to get around to renewing my inlinkz account.  But I am excited to have it back on and can't wait to see all the awesomeness you all have in store!  Our house was just listed on the market and we had our first showing today, we will see how it all goes but that has been keeping me busy...normally I like MAKING messes with my kids, having fun and doing projects and now I'm constantly cleaning and avoiding messes...ANYWAYS...

I also have an announcement to make.  August 19 I will be one of the co-hosts of the One Day Once a Month Thee Networking Blog Hop hosted by Kelly at Live Laugh Rowe

Mark Your Calendars and grab the button for your side bar as a little reminder if you like! :)  The more the merrier!


Photobucket

<a href="http://www.livelaughrowe.com/blog-hop/"><img src="http://i1184.photobucket.com/albums/z329/Kelly_Kuert-Rowe/Buttons/August.jpg" border="0" alt="Photobucket"></a>

Here are some of the featured posts from the last link up (3 weeks ago)

Starting clockwise from the top left

Housewarming Wreath by Living Loving Crafting
Downsizing the Supersize Dress Refashion by Petites Pashions
Beachy Living Room by Meeha Meeha
Rustic Star by A Creative Princess


Now link up your awesome projects using scraps (of any kind), upcycling, redo/makeovers, and anything you made including materials you found or had on hand.  We love thrifty, resourceful creativity!

if you like this linky/blog you can follow me on GFC, Facebook, Twitter, Pinterest or vote for me on Top Mommy Blogs...:)

Visit some of the other links and leave some comment love :)

No Giveaways

grab a button and post it with your other linky lists por favor ;)


Friday, July 20, 2012

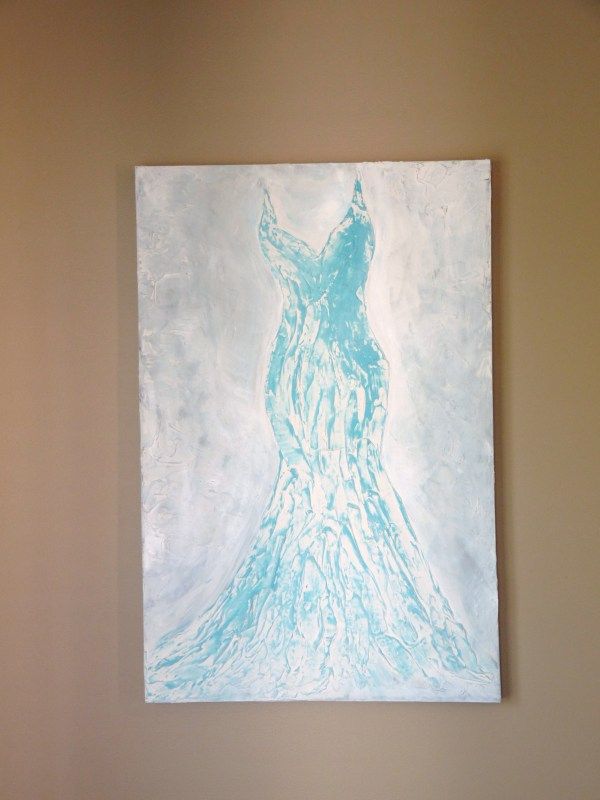
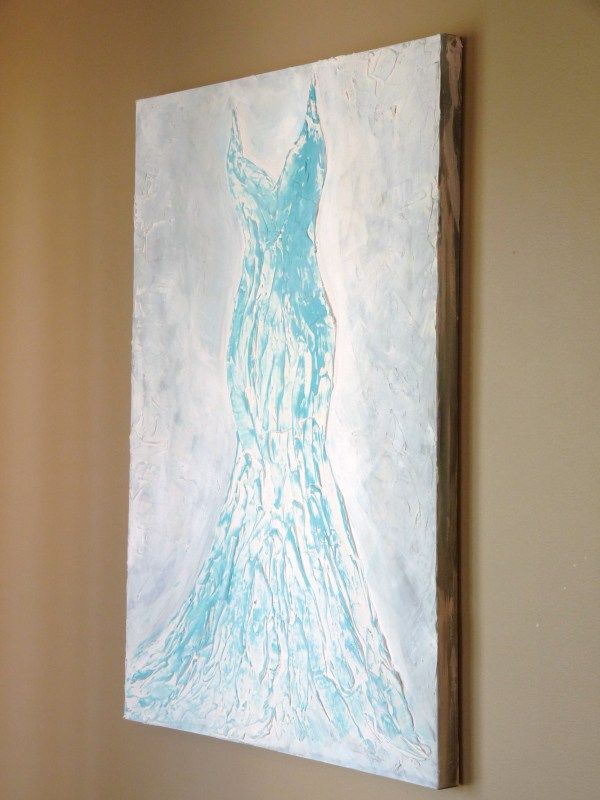
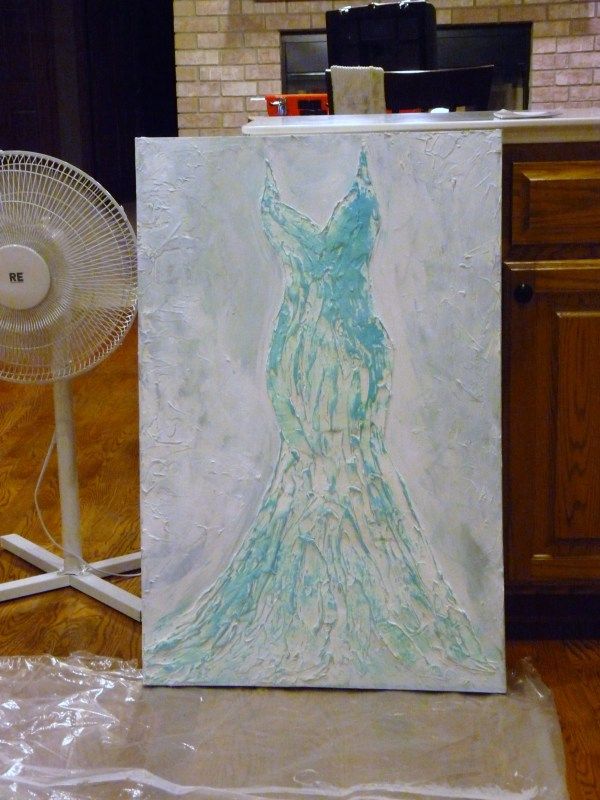
The Dress - Painting with Plaster

The Dress
Painted with Plaster
Photobucket
Photobucket
The first time I made a painting where the image was made with plaster and then painted over for a 3D effect was in college when I was doing some works for a production at the Yakima museum.  I made six 6x6 ft paintings...each one themed after the music compositions that were being performed.  My sister choreographed a dance to go with each song too so the production was a combination of live jazz, dance and visual art.  It was cool.  The plaster was used on a painting called Punctuation.  I made a huge punctuation mark on the canvas with plaster, then painted the whole canvas a solid color and then splattered it all jackson pollock style...I thought it went with the theme of punctuation with the punctuated marks they left.  ANYWAYS, I really enjoyed using plaster and have wanted to do it again ever since.  I have ALSO been wanting to make a dress painting for a long time too...like .....Then, a few months ago when I was researching faux finishing when I was getting ready to do the bathroom makeover  I discovered Segreto Finishes by Leslie Sinclair and fell in LOVE.  Then I was looking through the Segreto Art Gallery and saw the paintings by Rachel Schwind and saw the paintings she made with plaster and was inspired.  Her dress paintings with plaster are like the perfect combination of the 2 types of paintings I've been wanting to do for the last few years!  So I made this for the master bedroom.  

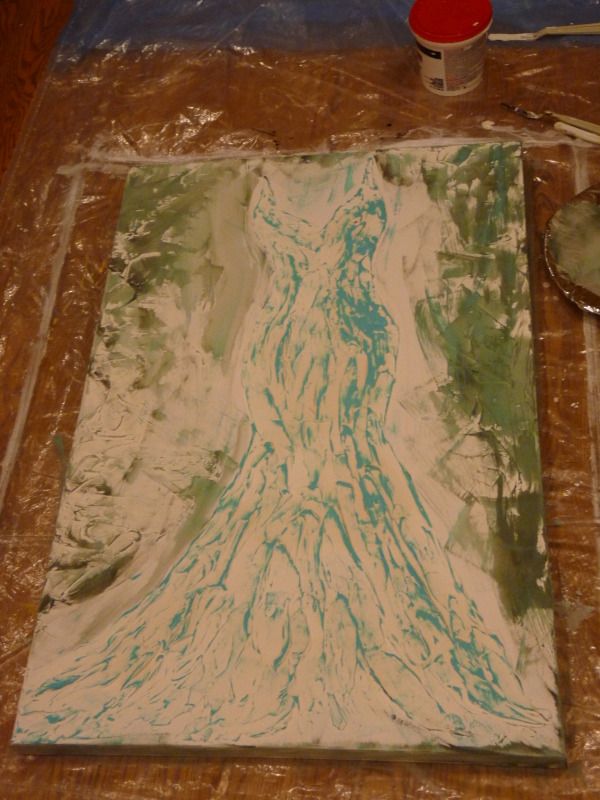
work in progress...
Photobucket
work in progress....
Photobucket

I wanted to make it more greyish and muted the way Rachel Schwind does, but wanted to have some blue undertones so I painted a mix of grey and teal on the background and then just teal over the dress.  I started adding a white-ish wash to the background..toning it down...but then I couldn't bring myself to do it over the dress...it wasn't what I intended...but I loved the pop of color...it still has the simplicity I wanted anyways.  I used plaster and painted it on with a palette knife.  waited for it to dry and then added paint.  Only mistake...I should have not done this on a canvas...the plaster is cracking like crazy so I am going to get a bunch of midge podge and paint that over top of the whole thing to try to keep it from cracking further and hopefully keep any plaster from cracking too much and falling off!  I would be so sad.  The cracks aren't too noticeable unless you get up and look real close but they make me nervous!  The punctuation painting was on canvas too and there was no cracking...even after trasport in a u-haul but maybe it was because that canvas was so thick and sturdy...these canvases I've been buying are really inexpensive and are light and flimsy...I'm not even sure if it's real canvas..it's almost papery because if I get it too wet...the edges start to fray...so maybe that is the problem.  But large canvases are EXPENSIVE!  This one was $16! and it's a good size!  you get what you pay for I guess.

Photobucket

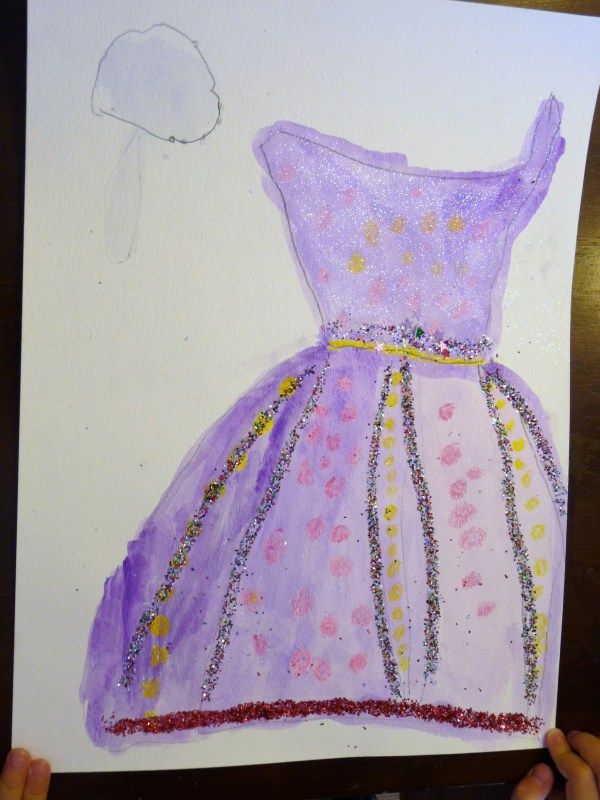
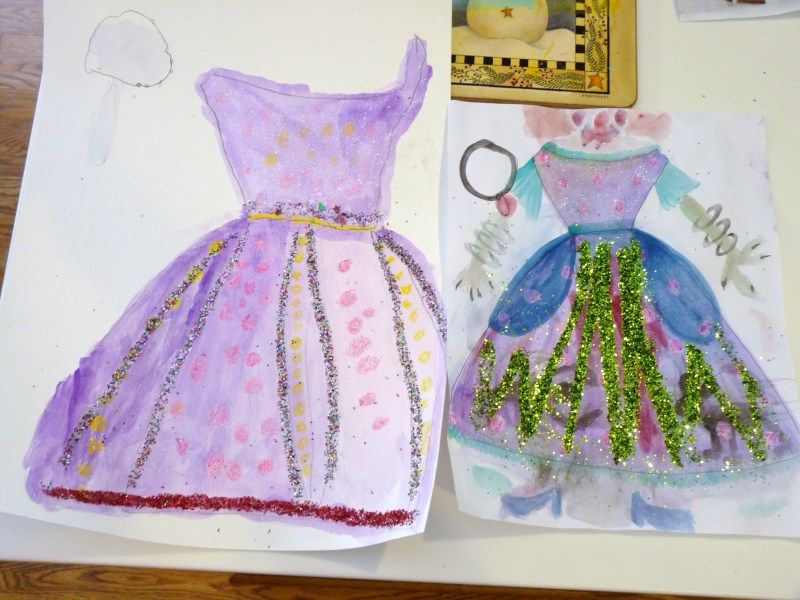
And after I made this dress painting, my 5 year old, who is dress obsessed, wanted to make a dress painting too and design her own dress so I did a google image search for dress paintings and let her pick out a reference picture and she made this, all by herself and she is so proud of it she keeps saying we need to send it to a factory so they can make it into a real dress.
Photobucket

When she seriously wants to draw something, I sit down and give her a little instruction by drawing the same picture along side her on my own paper and explaining what I'm doing as I go and then she draws hers at the same time.  It's from the Monart method when I was teaching art classes and it's nice because I never touch her picture and she can look at it after and be proud that she did the entire thing by herself.  As you can see I turned mine into a silly clown picture as we painted along side each other.  She wanted it to have polk-a-dots so I had her make the dots with crayons and then paint watercolor overtop, a 5 year old couldn't paint a polk-a-dot dress it would be a mess...so this worked well and kids always love seeing the crayon resist the watercolor.  When is was dry she added glitter.
Photobucket

While doing the google image search for "dress paintings" we found the artist Roxanne Rossi and I am LOVING her dress paintings.  So simplistic and beautiful I had to share!  Almost made me wish I painted something like this instead of the plaster dress....(almost! still love the plaster dress painting)