Showing posts with label tutorial. Show all posts

Monday, March 2, 2015

DIY Maple Syrup - Nature Study

Making Maple Syrup

Nature Study and being outdoors is a huge part of our homeschool life so I was thrilled when my husband decided to try tapping a couple of the maple trees in our backyard and make our own maple syrup.  My hubs ordered the taps off amazon and set them up and then we just had to wait for the right weather as the temperature has to have certain fluctuations overnight to get the sap flowing.  We finally had the needed fluctuation and got 3-4 liters of maple tree sap.

Can you see the 2 trees that are tapped with the 2 liter bottles? That's the maple sap collection set up

We measured it out with the kids and then put it in our largest pot to simmer all day.


 Finally the maple sap had reduced enough and we got about 3 ounces.  Just enough for our Sunday gluten free pancake breakfast!


We poured the final product into a recyled maple syrup glass container.  The maple syrup was just like...maple syrup.  The only difference I noticed with our maple syrup vs the kind we buy was ours had a slight vanilla taste to it.

Here's to learning how stuff's made....in real life!


Have access to any maple trees?  Here's how

Thursday, January 23, 2014

Astronomy Lap Book - Classical Conversations Cycle 2 weeks 7-12 Science

Classical Conversations Science Astronomy Lapbook
Weeks 7-12


I have wanted to share about homeschool and what we are doing and such...but we are keeping so busy I don't have much time for sharing much (the video ended up being a pretty good example why I don't blog often, soon as mom is busy someone starts crying or doing something)!  But I did want to share a lap book I created for our Science through Classical Conversations weeks 7-12 when we covered astronomy.  For the record we are doing Classical Conversations and using My Father's World for our daily learning.  We have enjoyed using both programs.  For Classical Conversations we are at the Foundations level and doing First grade with My Father's World.

Most of the pieces of the lapbook are in this google doc. The file for the parts of the sun was from The Wise Nest.  I'm not a lap booker, i like them, I just haven't gotten into it.  This is the first lap book I've made, it's nothing fancy, whipped it up along with a preschool version for the younger brother pretty quick but the kids were pretty excited about them.  Makes me think I should do more lapbooks.  Anyways, although not fancy  it gets the job done for covering the Foundations astronomy memory work from Classical Conversations and the kids thought they were really cool.

Here is a video showing how I put it together.


We Also got a free Moon App on my phone for tracking he phases of the moon.

When you print off the google doc the materials for both the Foundations version and the preschool version are there.  Then just grab file for the parts of the sun from The Wise Nest I was so happy when I found it she did a great job with that.  This Lapbook covers the questions "What are five kinds of starts?" "What are some parts of the sun?" "What are the names of the Planet?" "What are the phases of the moon?" What are some other bodies in our solar system?" and ?What are some names of U.S. Space Missions?"

If you don't want to watch the video demonstrating the lap book, here are a few crappy shots I took with my phone.

Foundations Version


Preschool Version for my son (I didn't want him to feel left out) not sure why the pictures are sideways but I am in quick blog mode and can't get them to flip so it is what it is.  The Preschool Rocket Ship lapbook version also has the second part with the planets that orbit the sun but I didn't photograph it since it's the same as the one in the Foundations version above.


Monday, August 6, 2012

Pinterest Challenge - Reversible Apron Dress

REVERSIBLE APRON DRESS

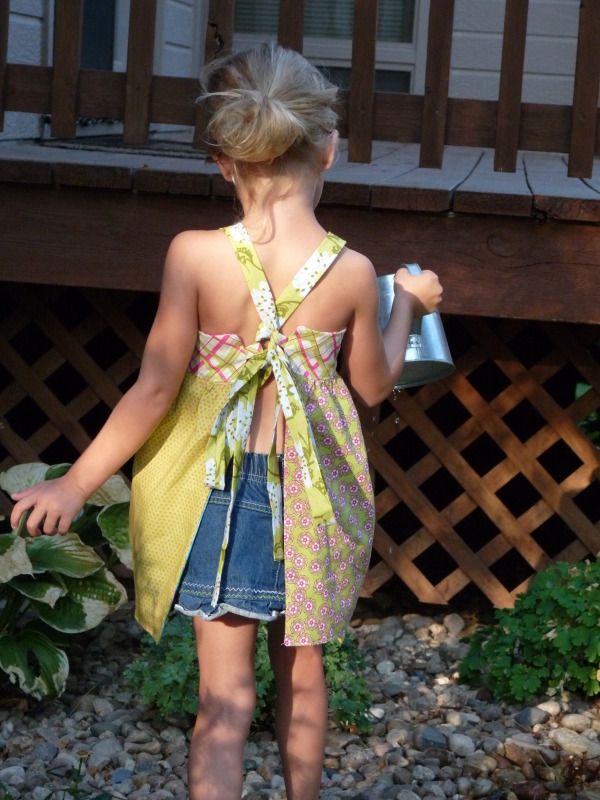
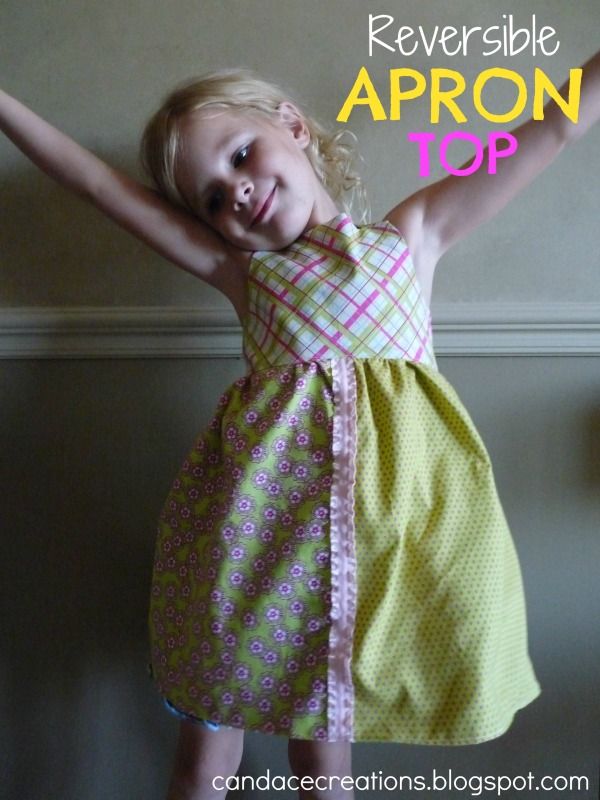
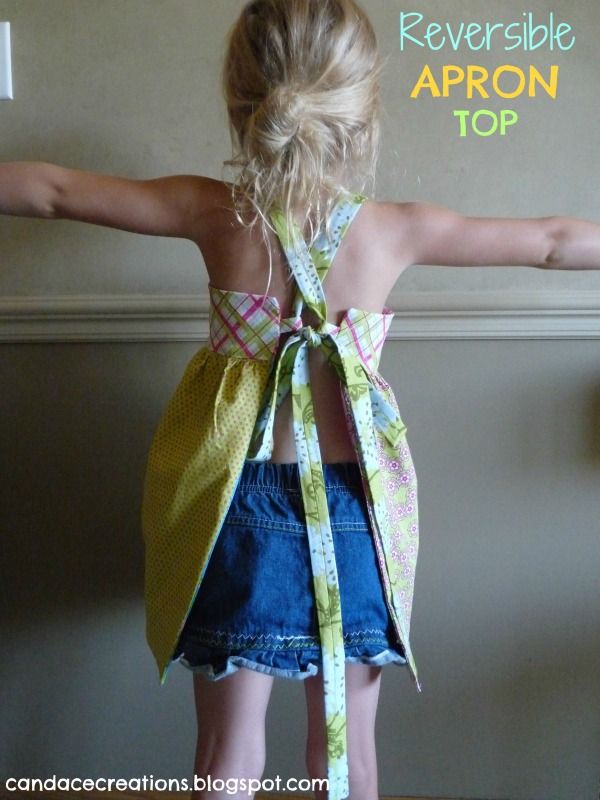
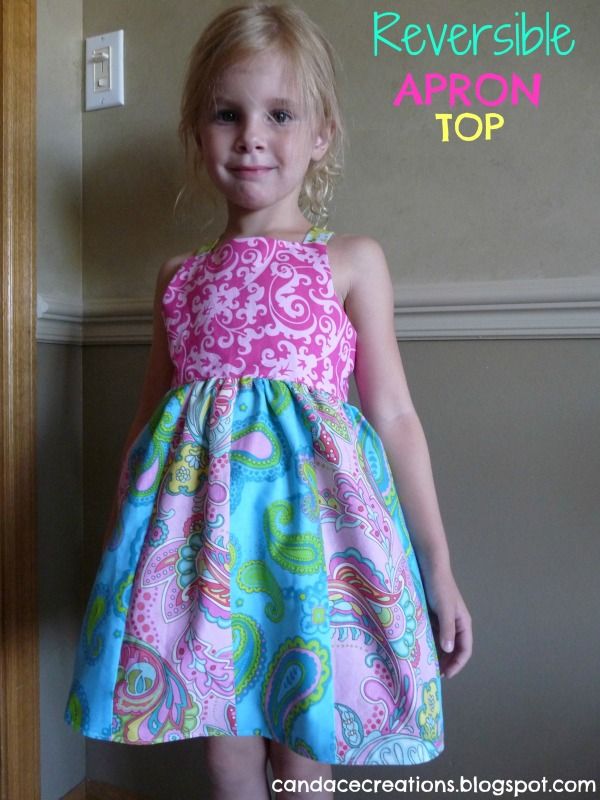
Well, selling our house has been slow going so far so I need to keep myself busy so I don't stress out about it.  Last night I started thinking about painting the kitchen backsplash to give it a faux finish stone look...you know...trying to feel in control of getting the house to sell quickly (not desperate it's only been 2.5 weeks, but who wants it to drag on right?)  Anyways, to keep myself from a possible disaster I decided to take the Pinterest Challenge today instead and make the Reversible Apron Dress I pinned from Scattered Thoughts of a Crafty Mom.  I bought the fabric a while ago and have been meaning to do it...so today was the day!  Once my little guy went down for his afternoon nap, I went to work on it, it came together rather easily and my piece of junk sewing machine actually didn't give me much to complain about.  My daughter had fun cutting fabric scraps and pretending she was making the same top for her doll.  Here is the final result (I would have taken pictures outside for better lighting but it's 100 out there and J had no interest .)  Anyways, I love how it turned out, as this is only my 3rd attempt at sewing clothing for children (2 Rapunzel dresses...one for J and one for my niece) and they were not perfect....this Apron Top was so easy, nothing went wrong and I am sooo happy about that (especially because did I mention I have the most annoying sewing machine ever???)

Anyways...Here it is


Wanna Try it?  

Check out the PIN HERE!


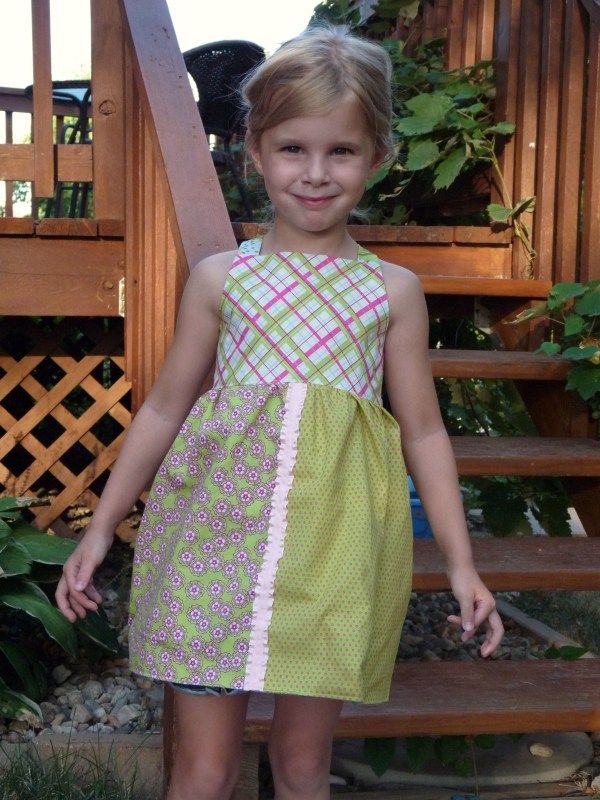
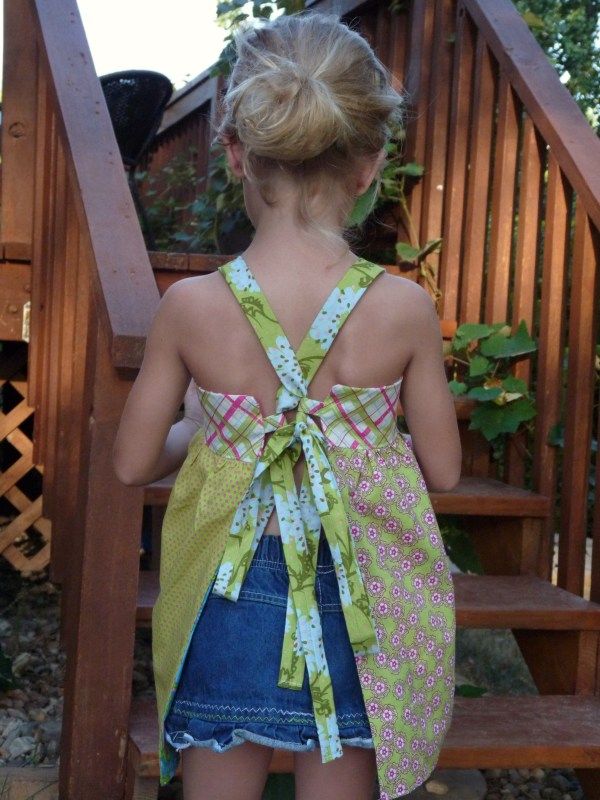
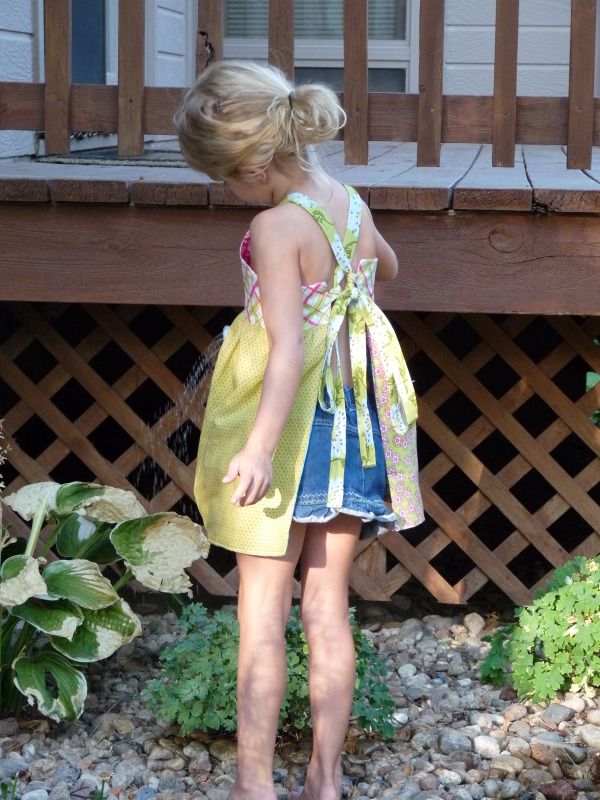
Here are a couple pics outside with better light with the green side.

Yes it's been so hot and dry for so long...everything is dying even though we water it.


Thursday, July 19, 2012

DIY Song Lyric Canvas Art
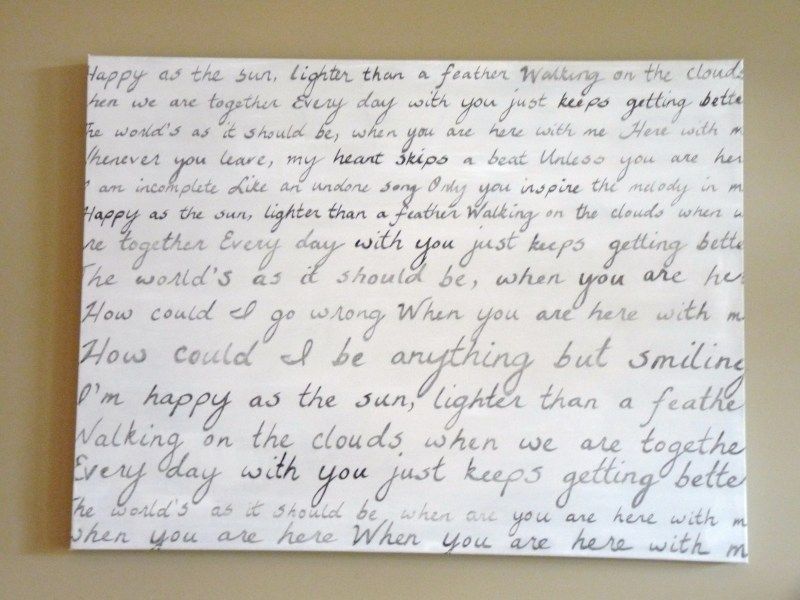
Song Lyric Canvas Art
Photobucket
So if getting a house ready to put on the market and taking care of a 5 and 2 year old aren't enough...Our walls were so bare because we've only been here a year and all the ideas for art I wanted to make...I hadn't gotten around to doing yet.  So as we were staging the house, I decided I was just going to buckle down and make some of the things I had been wanting to try but just haven't had the pressure to actually get it done.  That way, the house wouldn't be SO empty, especially since all we had up were family photos which we had to take down.  PLUS, the now I'll have some new art to hang up right away after we move into a new house and those walls won't be bare like this house has been.  Apparently I can get a lot done when I have no time...funny how that works!  (I've made 3 paintings this week.  I'll post the other 2 soon so stay tuned...and I will admit, there is no time for perfection or reflection so whipping these out..they are what they are and normally I haven't done a lot of painting because I stress about it, taking my time and what not..these are not perfect but it's nice to have them up!)

Pick out a canvas, I purchased a thick 3 x 4 ft canvas at the local craft store that has really cheap canvases...I think this was just over $20.  

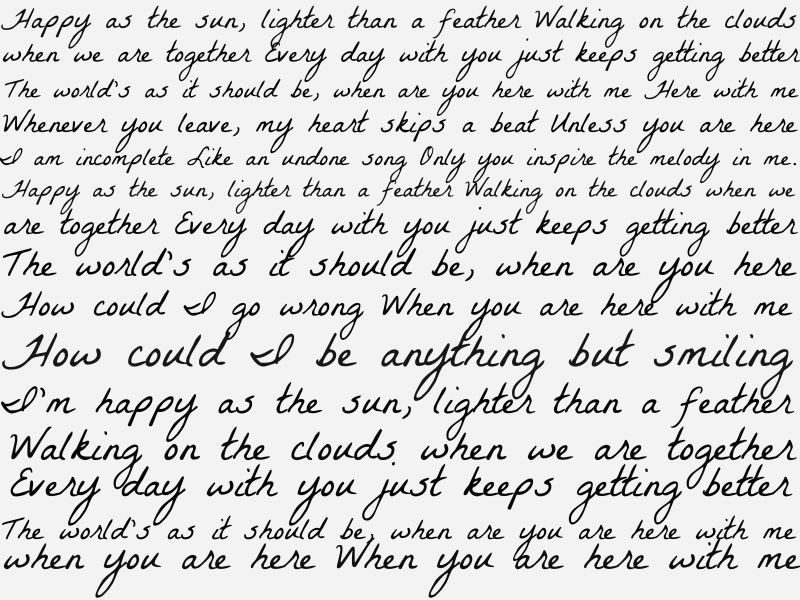
To start your song lyric canvas word art, find the lyrics to a song or poem that you really like and then use a photo editing program like picmonkey and add the lyrics/words line by line, editing each line to fit with the font you choose. Make sure you crop/size your template to scale of your canvas...since mine is 3x4 I made my template 3000 x 4000 pixels Here is what my finished template looked like...feel free to use it if you want, it is the lyrics of the song Happy As The Sun by Tyrone Wells (no I'm not OBSESSED but I do really like him and I liked these lyrics as I wanted a happy song that I could tell my husband and kids that it was about them).  
Photobucket

Take your finished template and upload it to a website like blockposters and select the size you want to print your image too and it will print your image onto the right amount of pages, blowing it up to the size you want.  now this isn't perfect...The template still ended up being a little bit bigger than my cnavas, which worked out since I had the thick canvas I just decided to wrap the words around the sides to make it fit without cutting any words out.  Print out the template and then trim all the pages and tape together.  Mine printed out onto 24 pages that I trimmed and taped together.
Photobucket

Now prep your canvas, if you want.  You could just paint the lyrics right onto the white canvas, but I didn't want mine to by stark white so I painted grey around the canvas, leaving some areas white...then after that was dry, I added a few washes of watered down white paint so there is subtle variation in the tone but nothing dramatic and it's not bright white.  
Photobucket

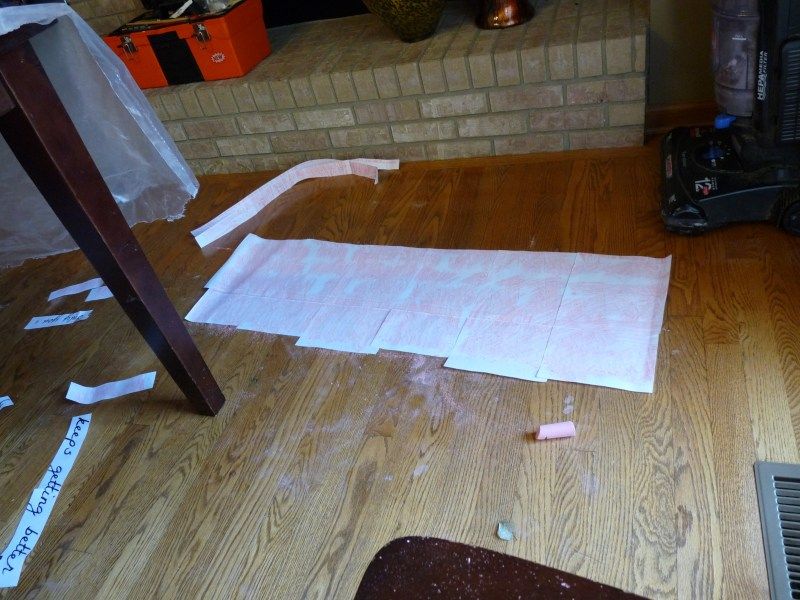
Take some sidewalk chalk (it wipes off easy without leaving the canvas dirty) and scribble the back of the top section of your template.
Photobucket

Lay it over the canvas, making sure it's straight and then use a pencil and trace over the letters to make a light transfer onto the canvas.  Now the chalk doesn't show up a TON but enough to make a guide so that the basic shape and spacing of the letters are consistent.   But to make sure I didn't mess it up or in case certain letters didn't show up well, I placed the template right below so I could also have a visual reference of what it was supposed to look like.
Photobucket

When I was done with one line, I would cut it off so the next line would by there, right below the line I was working on.  
Photobucket
Photobucket

Once you work through the first section, remove the template and scribble chalk on the next section and transfer...working your way down the canvas.
Photobucket
Photobucket

I used a small, flat edge paint brush and japanese sumi ink to paint on the lyrics.  I like the sumi ink because it flows on so nicely...I've painted words with paint before as well and you can use that if you want, but I just think the ink is much faster and flows better, especially for a more scripty font like I used.  
painted words, song lyrics, poem, canvas, art, words, script, painted words, song lyrics, poem, canvas, art, words, script

Once you are finished, make sure the ink/paint is totally dry, then you can wipe the canvas down with a cloth to get rid of all the excess chalk.  Then take some sand paper and lightly sand to your hearts content.  I didn't want the painting to be very bold and the black ink was so dark, bold and a bit shiny so I sanded away...and certain words that I wanted to pop out I sanded less.  Also, certain letters or words that were maybe a little messed up...I sanded those down a LOT which made the errors almost unnoticeable.  :)
painted words, song lyrics, poem, canvas, art, words, script, distressed

Now, Hang it up and enjoy!  I spent 1 morning on this, getting done just before it was time to feed the kids lunch...thankfully they were enjoying being friends and playing in the playroom without incident that morning otherwise this would have taken much longer.  

Photobucket


Monday, July 16, 2012

Quick DIY Fireplace Update

Quick Easy 
DIY Fireplace Update


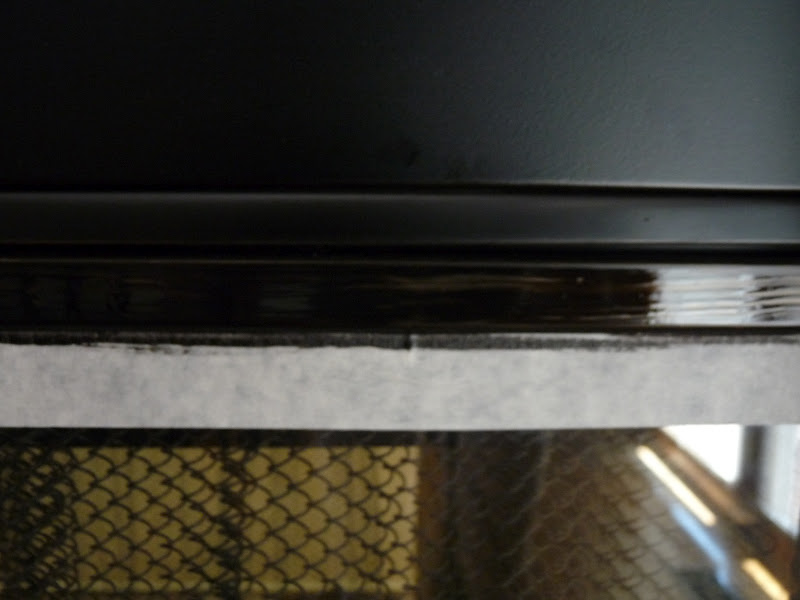
I have been doing tons of projects big, small, tedious, creative...you name it!  This May was our 1 year anniversary of living here in our first home and just as we were really feeling settled and starting to know what we wanted to do decorating wise (it took me a long time)...a great opportunity came up and my hubby's job is taking us to Georgia.  Our house was in great shape when we moved in a year ago so you wouldn't think there would be much to do to get it ready to go on the market....but there is still a lot to do.  One of the first, simple updates I did was paint the gold trim on the fireplace.  Our realtor said she spray painted hers black and I could not believe how brave she was to spray paint inside her house!  But I loved the idea so I found Krylon Satin Back Acrylic Latex Enamel paint at Walmart in the spray paint section and painted it on with a foam brush and it turned out perfect...I am so sad I didn't do this sooner so I could have enjoyed it more before listing the house (which will happen sometime within the next week).  $4 well spent!!!
I've done a couple other simple updates and projects so stay tuned...I've learned my lesson and will do these simple things right away in our next house!  (ps...So sad to sell this house...we LOVE it).

Here is the BEFORE.....outdated gold metal trim....

Here's all you need
                                      

Tape off the glass and handles if needed.

Here's how the first coat looked...I had a moment of panic if it was going to turn out super crappy...

Here is the second coat...looking a bit better....don't worry it dries pretty fast..5-10 minutes between coats
 Here is the 3rd coat.....
 and after the 4th coat (for good measure)

This is AFTER

So much better right?


Thursday, June 7, 2012

Pink Ceiling Fan Chandelier Makeover


  DIY Girls Ceiling Fan Chandelier
So this is a recent project I completed but took a while to share because I had to wait for my hubby to have time to install the fan.  This white ceiling fan had gold hardware and used to be in the master bedroom, we updated our room with something we liked better but our daughter J said she thought the white fan was beautiful and wanted it in her room.  She had an older uglier brown and gold ceiling fan light fixture in her room.  So I got some Rust Oleum in Berry Pink GLOSS and quickly took the fan apart which was super easy and spray painted the hardware pink.  Once it was installed and hanging up, I draped these jeweled garlands that I found in the wedding section at Hobby Lobby they were maybe $5 each or less with 50% off.  For the beaded strands in the center of the chandelier fan, I used some jewelry wire to attach  it to the bottom of the fan as you can see if you look closely.  It took a long time to get this project fully complete...but the project itself was really easy and quick to do...just got drawn out because it didn't match the mounting hardware from the old fan and hubby didn't have time right away to hang it...but here it is...my daughter loves her pink chandelier fan!  We have been turning her fan on at night and if we keep it on the low setting, the jewels on the chandelier don't jiggle around much at all...but on the 2nd and 3rd settings they begin to sway and make some noise so if you want to do this just keep that in mind and make sure you just use the fan on the low setting.

Stay tuned for more reveals from my little girls bedroom makeover! :)

Simply take your fan apart, keep track of where everything goes and then lay out on cardboard and paint with a glossy spray paint.  When paint is completely dry, reassemble your fan.

Install ceiling fan (see owners manual instructions if needed)

Drape jeweled garlands over the lights and metal posts.

Using jewelry wire, attach beaded/jeweled strands to hand from the center of the fan.

ENJOY!  SO CUTE AND GIRLY!  

Spray paint $4
Jeweled garlands $10-15 roughly

Update and turn an old ceiling fan into a super cute girly chandelier fan for less than $20!!!