Tuesday, June 23, 2015

Gluten Free Dairy Free 3 layer Cookies and Cream


Gluten Free Dairy Free layered Cookies and Cream Dessert

This is a perfect dessert for a hot summer day.  Not too sweet, light and refreshing.  Make the chocolate wafers and cream in advance and then these are super easy to put together and look fancy and impressive!  

First make the gluten free chocolate wafers from Nicole Hunn Gluten Free in a Shoestring website

Next make your whipped coconut cream.   I use 2 cans of tai kitchen coconut milk that has been in the back of my fridge.  Carefully take out without shaking or jostling, open and scoop out the thick cream that has seperated from the water.  Save the water in a mason jar to add to smoothies, homemade juice recipes or to drink by itself. Whipped the coconut cream on high speed while adding 2 TBSP powdered sugar and a tsp vanilla.  Taste and add more powder sugar if Desiree but I really don't add much, just enough to slightly cut the strong coconut flavor with a hint if sweetness.  Refrigerate the whipped coconut cream.

To assemble, it's pretty simple. Cookie, spoonful of whipped coconut cream, cookie, spoonful of whipped coconut cream, cookie topped with a smaller dollop of whipped coconut cream.  Then if Desired, add a splash of color with 1-3 ripe raspberries or blackberries etc.  cover with plastic wrap and keep refrigerated until ready to serve.  
Soo good I could eat these all day.  Low on sweet, light and refreshing...yum yum yum! The dark cocoa cookie, the whipped coconut cream with its barely sweet cool creamy coconutty delightfulness....is the really gluten free and dairy free?!?!  Yes...yes it is!  Hope you enjoy as much as I do...

Monday, June 8, 2015

Gluten Free Dairy Free Strawberry Trifle


There's nothing like fresh strawberries, whipped cream and some pound cake for a light, refreshing scrumptious summer dessert!  I made gluten free dairy free triffle to bring to a BBQ this past weekend and it was....eyelid flippin' good and easy to make ahead of time.

Gluten Free Dairy Free Strawberry Triffle with Coconut Whipped Cream

1 loaf pound cake (I used the recipe from gluten free on a shoestring and used a blend of earth balance buttery spread, organic palm shortening and coconut oil Bc I was low on all those things but all together had just enough to replace the butter in the recipe)

4 cans Tai Kitchen coconut milk 
Vanilla
Powdered sugar

Package of strawberries

At least the day before I put the cans of coconut milk in the back of the fridge to seperate the cream from the water.  
I also made the gluten free pound cake the day before. 

When ready to assemble, open your cans of coconut milk and scoop the thick coconut cream out into an electric mixer and save the coconut water for smoothies or to just drink.  With the whisk attachment, whip the coconut cream in high speed until fluffy, add a tsp vanilla (a splash I didnt exactly measure) and then slowly add a couple Tablespoons of powdered sugar.  You don't need very much, just taste and add a bit then taste and add a bit until it's slightly sweetened.  

Slice your gluten free pound cake into 1 inch cubes 

In a glass serving bowl add a layer of pound cake.  Then spoon on a layer of coconut whipped cream and top with sliced strawberries.

Repeat.

Repeat.

Cover with plastic wrap and keep chilled in fridge and ENJOY!!!!


Monday, June 1, 2015

DIY Mermaid Tail with Monofin


DIY Swimable Mermaid Tail with Monofin 
Under $12!!!

Last year when we were in FL with my husband for work, the kids and I were perusing some of the shops in Destin and this one fun children's boutique had these super cool swimable mermaid tails...my daughter and I both were excited when we saw them...until we saw the price.  The tails were well over $100 and since having my 3rd haven't really been interested in any sewing. But recently my daughter found a video tutorial on YouTube by Aprils Life and made me watch it and when I did I thought, ok that's AWESOME!!! But...jigsaw? Plexiglass? That black material over the plexiglass Monofin with the little cuffs for the feet to go through?  It was a great way to do it and the finished product looked very professional but more work that I was up for.  Then I saw another video and started to realize how simple it could be.  So I used inspiration from both those videos to construct our first swimable mermaid tail with a monofin.  First I had to hunt in my basement for something that would make good fin material and came across this cracked sterilite storage container lid we didn't need and decided it would work. I drew out a fin template and traced it onto the lid.  

(I think the pictures explain it pretty well so just scroll through a couple times to get the idea)

Carefully cut it out with a box cutter utility knife.  Be careful doing this and always cut away from yourself and go slow.

Lay your mermaid to be on a large piece of paper and trace around her waist legs and feet to make a pattern.


Cut it out

Get out your stretchy swimsuit type fabric Lycra/spandex.  I had 1 1/4 yards.

Fold in half with right sides together and wrong side facing out.  Make sure the stretch in the fabric is going horizontally to your tail...my fabric is folded the way it came off the bolt so you really just need to lay it out and make sure it's flat.


Cut around your pattern 

Line fin up and cut around the fin

Then take the fin you just cut out and flip it over and use that as template to cut out another set of fins.  You will have 4 fin pieces. 

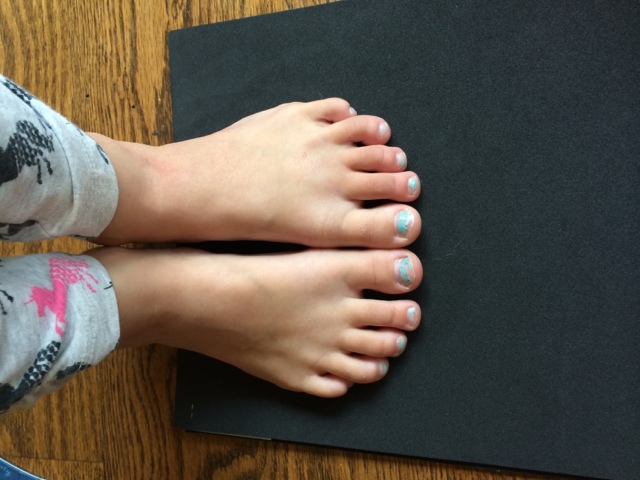
Take a sheet of crafts foam and trace the front 3/4 of your child's (or yours if it's for you) feet and cut it out.

Then on another sheet of craft foam, cut out a larger version as picture below.

Place the smaller piece on fin and have child place their feet on it.  Then place the larger foam piece over top and figure out the placement and where you will glue it so it create a pouch for their feet.

Use glue gun and glue on the smaller black foam near the top...and follow the pictures as follows, it's very simple.

I cut out an extra little piece to cover that little bit if plastic that was poking out the top.  This wasn't completely thought through I was experimenting as I went.

When you glue on the top piece make sure it's popping up a bit so it's not too tight and easy to slip feet in and out. 
This would count as the "handicrafts" portion of a Charlotte Mason-ish education, working alongside me, helping with the parts she can.  Here we pinned all along both long sides of the tail leaving the top and bottom open.

Pin your mermaid tail fin together all the way around leaving the top open and repeat on the other fun set.

Sew around the edges, if you don't have a serger (if I did this would have been soo much easier) go SLOW.  At first it kept slipping but I finally found the right tension and got it to work.  I also went back over all my seams with a zigzag stitch.

Flip your tail find right side out.libe them up with the bottom of your tail like pictures below.  I folded in the bottom of my tail to create a point and pinned in place.

Then opened it up

And did the same thing in the other side with the other mermaid tail fin.

Then I sewed along the folder edge of the tail, with fabric lined up right with right edge if presser foot and the needle set to the right (I'm not a professional seamstress I don't know the right lingo)

Should look like this...

Then sew other fun on the same way...now it should look like this

Line up the mermaid tail fins as best you can and pin the edges together...it's OZk to fudge it if you need to.
Straight stitch down both sides of tail (when you get to the tail switch it to R side stitch to get a little closer to the edge and stitch around tail leaving a good amount of the bottom open for taking the Monofin in and out). After you can reinforce with a zigzag stitch down the sides and then stop at the fin.  Unless you have a serger than you don't have to worry.

Showing how I only sewed the fin together a couple inches on the bottom of each corner leaving most of it open.

Nowf flip that mermaid tail right side out and insert the monofin and have your mermaid try it on and check everything.  It felt tight to her at first in her feet but the fabric has loosened a but but also she just wasn't used to the feeling of the mermaid tail.  Ours had a lot if extra length at the top, enough she can pull it up to her underarms for a full body mermaid tail or she can just have it more bunched up around her waist like in the photo below and not pulled up all the way.  This tail is fitted do well and with the stretch fabric I really didn't feel the need to add an elastic waistband or drawstring so we just left it the way it was ...I didn't even good the top over to hem because it looks fine as is and functions fine as is.  We tried it out at the lake the next day and at a friends pool today and she has had lots of fun swimming with it. Also it is nice having the bottom open to easily get the fun in and out to help get sand out and also if she needs help getting her feet in I can reach in there to help guide her feet in.  And I like the idea that if the craft foam ever rips I can easily access it and repair it.
$


Made a couple more and used a ball point needle and had no issues with the fabric slipping and skipping stitches.  These are a couple of pics I posted to Instagram as part of #thelittlestmermaid challenge doing Acro yoga with the kids :). We love this my mom used to do this with us as kids but we didn't call it a to yoga we just called it an airplane ride ;)