Sunday, February 28, 2010

Beautiful Blog Award


So exciting! I received a Beautiful Blog Award from a new blogger friend the other day and was SUPER surprised and flattered! I was like...wait....someone actually found my blog and liked it that isn't a relative or personal friend?!?! WAHOO!

I received this award from Stacey over at Boy, Oh, Boy, Oh Boy! whom has a really fun blog that I've just am getting familiar with and having fun looking around and exploring. I was really surprised to see that she made homemade perogies in one of her posts! My husband and I LOVE perogies and he is always trying to perfect his recipe and technique...but it seems like no one else even knows what perogies are! (They are SO missing out!) Anyways, she has some great ideas on her blog and I can't wait to spend more time over there. Thank you Stacey! You made my day!

Now, onto the rules
1.Thank the link to the person that gave you the award

2.Pass this award on to 7 bloggers you've recently discovered and whom you think are fantastic

3.Contact said Blogs to let them know they've won

4.State 7 Things about yourself!

So, here are a few of my most recently, favorite blogs:

1. Can I pass it back to someone who already got it? I'd love to award to to Stacey!
2. Mia Joie
3. MaryJanes and Galoshes
4. Made By Bronwyn
5. Raised in Cotton
6. Melonbelly
7. Wanna be a Balanced Mom
8. The Mommy Files

These are all SUPER fantastic blogs I have recently found and fell in love with!

Oh yeah, and 7 things about myself:

1. I'm 34 weeks pregnant and feel like I'm going to POP! And I can't wait to get back to the GYM!
2. Although I grew up in Canada, I LOVE the almost snow free winters in the south!
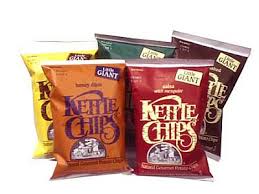
3. I LOVE french fries
4. I LOVE Chocolate...a real chocoholic here!
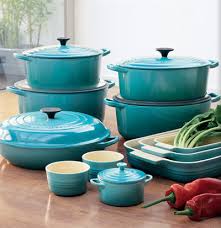
5. I love the color teal/aqua/turquoise
6. I've been able to create a residual income from home for a little over 2 years now...without any investments! HERE's how!
7. I Love attempting to recreate things that I fall in love with but can't afford!

Milk Jug Bath Toy Scoop


Reduce.Reuse.Recycle.....Here is a great way to recycle and reuse that milk jug you just finished up! Simply cut the top off like this......


Then poke some holes in the bottom like this.....


And now you have a super useful toy scoop for picking up all those toys in the bathtub and keeping them from getting mildewy! Some things are just TOO easy not to do! I saw this in my most recent issue of Family Fun magazine and it works great! It makes for a fun bath toy too as my daughter likes to use it like a net to catch her toys while in the tub...and she likes when I fill it with water and let it "rain" over her. And to think I almost BOUGHT a turtle bath toy scoop at the store the other day!!!

Wednesday, February 24, 2010

One Groovy Mom

That is what I have been renamed by the Posh Mom Nickname Maker! When you have a day like I did today, with no time for anything else, you can at least have a new cool nickname created for you!

Other than that, I made a turquoise (turqouise, aqua, teal-MY FAVORITE COLOR!) beaded bracelet to imitate one I saw on Stella & Dot (Love their jewelery!) . I finished it a few days ago, but have yet to put the button closure on it. Having a cranky toddler and being 8 months pregnant doesn't leave my much energy or motivation to get my projects done! Just ask my husband who wonders if we should move the dryer into our bedroom since it seems to be his new dresser....hey, if he wants the laundry folded and put away THAT bad, he could always do it right? lol...Just teasing, he's a super great husband who will do any chore around the house (except anything that involves touching laundry). He's also a GREAT cook, much better than me! One of his favorite things to do on a weekend is make some homemade pasta, gnocchi, lasagna or Neapolitan Pizza (he's a pizza snob and has broken 3 pizza stones trying to perfect his method!)

Anyways, I know this was a random post but I promise to post some new fun stuff soon!
And because I hate to post without a picture, here is the Stella & Dot Bracelet I'm imitating. I should have it finished and posted on here SOON!

Sunday, February 21, 2010

Ribbon Pinboards - Pottery barn Kids


My Covered Pinboard

I recently saw these adorable ribbon pinboards in the Pottery Barn Kids catalog and thought they were very cute (and of course pricey!). It reminded me of the pinboard in my daughter's room. I had this really big bulletin board from my college days. When I was trying to make some decor for her nursery when she was a baby, I had no money, so I picked up some cheap fabric, and using my trusty staple gun, covered the bulletin board with the girly fabric. (I stapled it on the back). I cut little slits in the back where the fabric covered the hanging hardware, then attached this big pink ribbon to hang it on the wall with. That was almost 3 years ago now, after seeing the pottery barn ones, I'm tempted to recover it with new fabric and add the criss-crossing ribbon. With a yard or less of some fabric and some grossgrain ribbon, I can easily have a replica of the Pottery Barn Pinboard for only a couple bucks! Either way, with some spare bulletin boards and fabric, you can create a similar effect and save yourself up to almost $100!!!

Fine Art on the Cheap


I think all three prints are by the artist Greg Olsen.

I've really been wanting to put some nice fine art prints in my daughter's room, specifically a painting portraying Jesus's love for children. Buying framed fine art prints can be pricey however. Well, I found this 3 opening frame at Micheal's on clearance for $2 so I picked that up. Then I picked up these small art prints, the center one is a 5x7 post card and the other 2 are 3x4 cards that were less than $1. I think the post card might have been $1.99. I had some purple scrapbooking paper laying around, so I used that as matting on the smaller prints and woila! I was able to put some fine art prints in my daughter's room for around $5! One of her favorite songs to sing before she goes to bed is "Jesus Loves Me" and so I put the frame by her bed and we point it out when she sings the song or says her prayers.


Mother and Son
by Robert Duncan

Another great way to get fine art prints to display in your home is to recycle the pictures from fine art calenders. One artist I enjoy is Robert Duncan, I buy his calenders and then save them after the year is over, that way I can cut out the large art prints and frame them. The great thing about recycling fine art calenders like this is that you can rotate out the art in your frame to suite the season/ time of year! A very frugal way to add to your home decor!

Kids Art Display - PB Knock Off


Potter Barn Kids - Star Art Cable $39


Kids Art Display - FREE!

One of my favorite things to do is get a new Pottery Barn Kids catalog in the mail and go through, looking at what can be easily and cheaply replicated. This one was just too easy to pass up on! Just use what you have on hand, some ribbon, cording, yarn, wire, etc. I inserted a clear tac in the wall on either side and tied the ends of my ribbon/cord around the tacs. Then I just used paper clips to hang the art, since that is what I had in the junk drawer! This is about a 1 minute project and your child will be so proud to see their creations on display like this. My almost 3 yr old daughter loves going into her room now, looking at her art display and beaming with pride says "oh look, it's SO CUTE!" And now she's even more excited to create more works of art for her wall.


Wednesday, February 17, 2010

Play Wallet


Here's the wallet I made to go with the soft play purse I made for my daughter. She loves it. You can see in the second picture, I printed off some play money that I found with google image search, and made a drivers license with her picture on it and glued it to card stock. I also threw in a couple of old gift cards that look like credit cards. She likes to put her toy cell phone in the purse and her plane ticket from our travels over the holidays.
I didn't take pics along the way for a tutorial because I didn't know if this was going to turn out! I was just making it up and, as my MIL would say "fudged it". It was a good way to use up the leftover fabric scraps from the toddler purse!

However, if you like the matching fabric play purse that goes with it, you can check out the tutorial HERE or Here.

Creating Income from Home

Most of my posts are about making stuff...and one of the things I like to "make" are eHow articles! It's a great way to earn extra income from home. I've been on eHow since October 2007.
You have probably already heard of eHow or visited the eHow website at some point or another during a google search, as eHow articles tend to climb up rankings of google search results really well.
In the beginning there is a definite investment of your time and you won't see significant earnings immediately. However it really pays off with the residual earnings you keep getting from your published content once you've generated an article base and spending a little time doing some online networking never hurts. I've found this to be a much easier, more reliable way to make money from home while being a full-time stay at home mom than anything else. To give you an idea of how your earnings can grow and how the time you put in to creating your articles really pays off, here are my earnings for 2007, 2008, and 2009:

2007: I published my first article in October and by years end, earned $161.73 USD (however, that did include $50 from a bonus/contest that was going on in December).

2008: My articles brought in $1,815.31 USD

2009:
I earned a total of $3,021.36 USD

And I have to admit, 2009, I really slowed down on my article writing...I moved and was busy with other projects, I feel like I hardly wrote anything, however, my earnings continued to grow.

That's what I love about eHow, you can take a "break" or "vacation" whenever you want, for however long you want...and the residual earnings still show up in your paypal account each month!

Ehow
is a company run by great people whom I've had the pleasure of meeting when I was invited to attend the past 2 eHow User Events hosted in Santa Monica 2008 and San Fransisco 2009.
Santa Monica 2008
San Fransisco 2009


I have been featured on the eHow website several times, U.S. News & World Report Weekly,
And NBC Dallas sharing how I make money from home creating online content.

If you can write, already have a blog and/or write tutorials, this would be right up your ally and a great way to make extra income for your family...even if it's just enough to cover your arts and craft supplies!!! On the other hand, my friend Maria, aka writergig, whom I met at the first eHow event is one of several people I know who makes a pretty substantial income from her eHow earnings. She earns over $1000 a month from her bank of eHow articles. She blogs about working from home and has a fantastic eBook that can help you greatly improve your earning potential HERE.


Below is a screenshot of her actual monthly earnings:


After reading her eBook, I was able to tweak my older articles and change the way I approached writing articles and saw a significant jump in my earnings and I would definitely recommend this book to anyone who wants to write online content. What you learn from this book can be applied to any source of online content you create to increase earnings and search rankings, such as blogging or creating niche websites.

I know so many other moms always seem to be looking for ways to work from home, or make extra money so that is why I wanted to share this great resource with you. Rather than buying into a business and having to host parties and hunt for clients and sales, you can write online, anytime about anything (in how-to format) and get paid for it over and over again once you hit that publish button! It's GREAT! and it's FREE!!! (although I would recommend getting that $25 eBook so you can learn how to create better earning articles right from the start- it'll pay for itself pretty quickly!)

Saturday, February 6, 2010

Cupcakes and a Blog Award!

Yummy....delicious vanilla cupcakes with chocolate ganache frosting! mmmmmmmm


My FIRST EVER BLOG AWARD! YIPEEE!!!


My good friend Tori just awarded me with my first ever blog award! Thank You! She and I go way back and even though we now rarely see each other, blogging is one of the great ways we stay in touch and keep informed on each other's lives. She is one of the funnest and cutest gals I know! She blogs about her new life as a military wife!

To accept this award I must list 10 things that make me happy and then pass this award along to 10 fabulous blogs!

10 Things That Make Me Happy:

My Family

The Beach/Shore....Here we are at the shore in CT!


Chocolate!!!
I'm an official chocoholic, it always makes me happy!


The Color Teal
(Tori, it's not just your color!!!)


Roaming Craft and Fabric Stores-
getting inspired and getting supplies for...
Making Stuff...
nothing better than finishing a fun project and feeling productive


Facebook, Skype and Cellphones -
helps me keep in touch with my great family and friends!


eHow & Paypal...
Love getting to see those residual earnings deposited each month!
(Hey that's my user pic in that image!)
You can see my articles HERE.

Kettle Chips or French Fries
I know it's horrible, but I LOVE potato chips and the crunchier the better! I also am addicted to French Fries. Healthy...I know!


My Camera...
I just love pretending to be a photographer!


Hot Tubs
I can't use em now, but I LOVE hot tubs! I told me husband that when we get a house, it's an essential item!

NOW...Let's see that yummy Cupcake Again!


Don't those cupcakes look delish? I made these Vanilla Cupcakes (inspired by Smashed Peas and Carrots -click for recipe) and was taking a break before I make a Chocolate Ganache frosting when I read Tori's post! So here are some yummy cupcakes to celebrate this fun award with! (or we can call it what it really is....a raging pregnancy craving)...


Thursday, February 4, 2010

Rose Petal Tutu Tutorial - Land of Nod Knock Off


Rose Petal Tutu knock off from Land of Nod

The Tutorial in 10 Easy Steps!

Supplies
Elastic band for waist
2 1/2 yards Tulle/Netting
Matching thread
Floral Rose Petals (I bought the box of rose petals located in the wedding isle at Hobby Lobby or Joanns)
Matching Ribbon 1.5-2 inches (I recycled the ribbon from a bouquet of lilies my hubby brought me 2 weeks ago for our 3 year wedding anniversary!)
Big Flower for embellishment

1. Measure your child's waist and write it down, then measure from your child's waist to their knee, write it down. Now take the measurement from the waist to knee and double it and add a inch. My daughter's measurement was 10 inches from waist to knee so I needed my netting 21 inches wide. (10+10+1=21)

2. Cut the netting so that it's the correct width, (mine being 21 inches wide) by 2 1/2 yards long.

3. Fold the netting in half lengthwise, and sew a seam all along the open edge.

4. You now have a very long tube of netting. Flip it right-side out.

5. Sew a second seam parallel to the first seam, wide enough to fit your elastic band through.

6. Now match up the open ends of your tube, and sew a seam starting from the bottom of the skirt. Stop your seam 2-3 inches from the top, leaving an opening for inserting the rose petals and the elastic.

7. Insert the desired amount of Rose Petals into the skirt through the opening. I used about half a box of rose petals.

8. Insert elastic band into casing. I put a safety pin on one end to help pull it through, and I also used a safety pin on the opposite end and pinned it to the end of the casing so the whole elastic wouldn't pull through. Sew the ends of the elastic together.

9. Finish up the seam to close the skirt. Trim away any excess netting if you need to. Flip tutu right side out so seams are inside.

10. Place the ribbon and the flower in the desired position, mine is off centered, and pin in place.

ALL DONE!!!


This project only takes about 40 minutes to complete. The Rose Petal Tutu on Land of Nod is $30 but this cost me $6.55 to make (and the big flower was 2.99). I spent a total of $11.66 on supplies and have enough left over to make at least one more. I used a 40% off coupon at Hobby Lobby for the box of rose petals, and used ribbon I already had. You don't necessarily have to use rose petals, if you have floral stems lying around the house, you could pull the petals off and put those in the tutu.

ENJOY!


Wednesday, February 3, 2010

Rose Petal Tutu


Rose Petal Tutu Knock Off

I LOVE going through those expensive catalogs such as Pottery Barn and Land of Nod, they are full of great ideas and many of them are so cheap and easy to replicate. This is my most current knock off, a best seller on the Land of Nod website, it's the Rose Petal Tutu. I thought this would make for a great Valentines Day gift for my little sweet pea who is obsessed with wearing princess dresses and tutus.


Just in time for Valentines Day!!!

A tutorial on this one is coming soon...

My Version...


And on the topic of Knock Offs, There was a really fun and interesting post by Holly on her Homebody blog that I quite enjoyed entitled "Who's Copying Who?" She showcases some of Pottery Barns new items that seem to look just a little too familiar to those in the crafty blog world. A lot of people make knock off versions of Pottery Barn items, but it this case, it seems Pottery Barn may be knocking off the blogs...only charging an arm and a leg for their versions! lol.
This inspired Holly to host a Pottery Barn Knock Off Party! it's scheduled for Tuesday, February 16 GO HERE to link up your PB knock-off. It can be something new, or something you did a while ago.


Meanwhile, my sweetpea and I made some YUMMY Chocolate Chip Cookies today with a recipe out of my Better Homes and Garden Cookbook....Soft...Chewy...and Really Good!