Monday, July 25, 2011

Restoration Hardware Inspired Pillows - Tutorial

Restoration Hardware Inspired Pillows
hand painted on canvas
  I have a thing for the natural linens and natural and neutral colors of Restoration Hardware and am a fan of the  

Presse Parisienne Burlap Pillow Cover.  I love the faded charm and vintage look so I decided to make my own version.  Now, I know these are not a actual knock-off because I didn't use french words to mimic the old bank bags and flour sacks like Resto did and they aren't the exact same style but it was the inspiration for this project.  I like the idea of incorporating stories and meaning throughout your home as much as possible...doing things with intention.  Kind of like how in Art History you see a painting that's interesting/beautiful to look at and you can enjoy it without knowing anything about it, but most likely, there is something more to it, a depiction of an event, a story, symbolism of some kind or another that the artist intentionally added.  So not that these are some great work of art like that....but I was just going for the symbolism aspect.  OK so I made the first pillow a tribute to our wedding date, but the other two pillows may just look like more nautical themed decor, but they represent our family history because my husbands ancestors were ship builders and that's where his last name comes from, and then I also remembered that some of my ancestors were ship owners that brought over some of the first Americans.


This project also cost me nothing since I had everything on hand...I have a big roll of raw canvas from an art project I did back in the day.  

Supplies
raw canvas, burlap, or undyed cotton fabric or other linen-type fabric
burnt umber acrylic paint 
flat paintbrush
scrap cardboard
charcoal
pencil
sewing machine
matching thread
pillow forms
image or lettering printed to desired size (how to print a picture on multiple pages info here)
tape
scissors


Find or create an image you would like to transfer onto your Restoration Hardware pillows.  If you are doing words, just select the right font and sizes and print out.  Figure out the size of your pillow and how big you want your image to be and click here to see how to print a picture on multiple pages.


Trim the pages and line up your image and tape all sections together.

Flip your printed image over and shade the back with charcoal as pictured.  I used a willow stick the first time and it wasn't as messy as the chalky charcoal I used in the picture.


Once the back surface is covered with charcoal, flip the image over and line up on fabric (raw canvas in my case) and tape down so it doesn't slide around.


Using a mechanical pencil or sharpened pencil, carefully trace over your image with firm pressure to transfer the image to your fabric.  Carefully pick up one side and take a peek under the paper to see if your image has been fully transferred or if you need to go back over a couple areas.  It won't be perfect but it will give you a good outline to go by.


Using Burnt Umber Acrylic paint (I used Dick Blick) I would get the paint on my flat paint brush and then run it over the cardboard to keep the tip flat and remove excess paint.  I did not use any water.  Then carefully go over your pencil lines and paint the outline of your image (or just paint your letters this way). You may want to practice first on some scraps.  After I had my outline done, I went back and did some filling in and shading but it was very minimal...as you can see in the ship wheel, on the spindles I would place my brush down on the outline and then drag it towards the middle of the spindle and pull up just a little bit and did that all the way up the spindle to create some dimension.  But how you decide to embellish on your outline is totally up to you and dependent on your image.  But with these pillows, the simpler and more basic you keep the image and detail....the better.  I also reminded myself not to go crazy trying to make these so perfect  because they are supposed to have a vintage, worn look to them and so every line doesn't have to be perfectly evenly shaded.  And I promised I wouldn't care when they got thrown around either, if the image gets worn from use...it'll just add character. :)

Now, measure the size of your pillow form and then cut the fabric to fit, adding room for seam allowance. (I added 1/2-1 inch which is being generous, but I figured I could always make it smaller...can't make it bigger)  Then cut fabric for the back, cut two pieces large enough to overlap by a couple of inches.  Give yourself a few inches to work with.

Fold the raw edges back on the overlapping pieces and iron as pictured above.

Sew a straight seam to finish the edge on both pieces.

Now line up your pieces with the right sides of your fabric facing each other.  Finished seam down against painted fabric.

Place the overlapping piece on, right side down also as pictured.

Pin around the edges.


Sew a 1/4 inch seam around all four edges, back stitching at start and end.

Using the slip opening, flip the pillow cover right-side-out.

Take pillow form (or in my case, nasty crusty kid wrecked pillow) and insert it into your custom, hand painted "vintage" burlap pillow cover to add some rustic charm to your space!


On the anchor, once the dry brushing was done, I wanted to add some faint color to the rest to add more dimension so after I had painted the outline and dark areas of detail, I did go back with a little water and a super small amount of paint just to barely tint it and went over the interior of the anchor, added a little more detail.


NOTE: I just saw this tutorial on Knock Off Decor and it's a much easier/faster method, especially if you don't feel comfortable hand painting!

Drop Cloth Pillow Case Knockoff

from the Shabby Beach Nest


Sunday, July 24, 2011

The Problem Child - I mean Crib Makeover

This is my little guys crib BEFORE
with his sister's old bumper that was falling apart
So I decided to make a slip cover to spruce it up and make it more "boy" you know...cover up the butterflies and flowers!  So anyways, I started this "simple" project many months ago...way before we moved, when he was a much smaller baby....like SOOO long ago...and right from the beginning....this project that was supposed to be quick and easy was just a tedious pain in the ***!!!  Every single step, something went wrong...I don't know what my problem was...sometimes it was me, sometimes it was the sewing machine and mostly it was just that stupid green fabric!!!  But alas...I finally hunkered down and got it done...Once his first birthday passed in April and I still hadn't finished this project I knew I had to finish it...I just started getting to the point where everytime I thought about working on it I just got anxious because it was not fun!  I got it done pretty soon after the move in May, but then had computer issues and then was gone...so finally....Here it is...The Crib Bumper Slip Cover
I originally was going to make this into a tutorial...but given the way it went for me...you wouldn't want MY instructions! lol

The green ribbon trim on the bottom is the result of a mistake of making the outside panel too narrow and needing to make it wider I had to cut long 2 inch strips of fabric, sew them together then add them to the whole thing...I decided to make the mistake into an opportunity to add to the design by adding in the green ribbon.
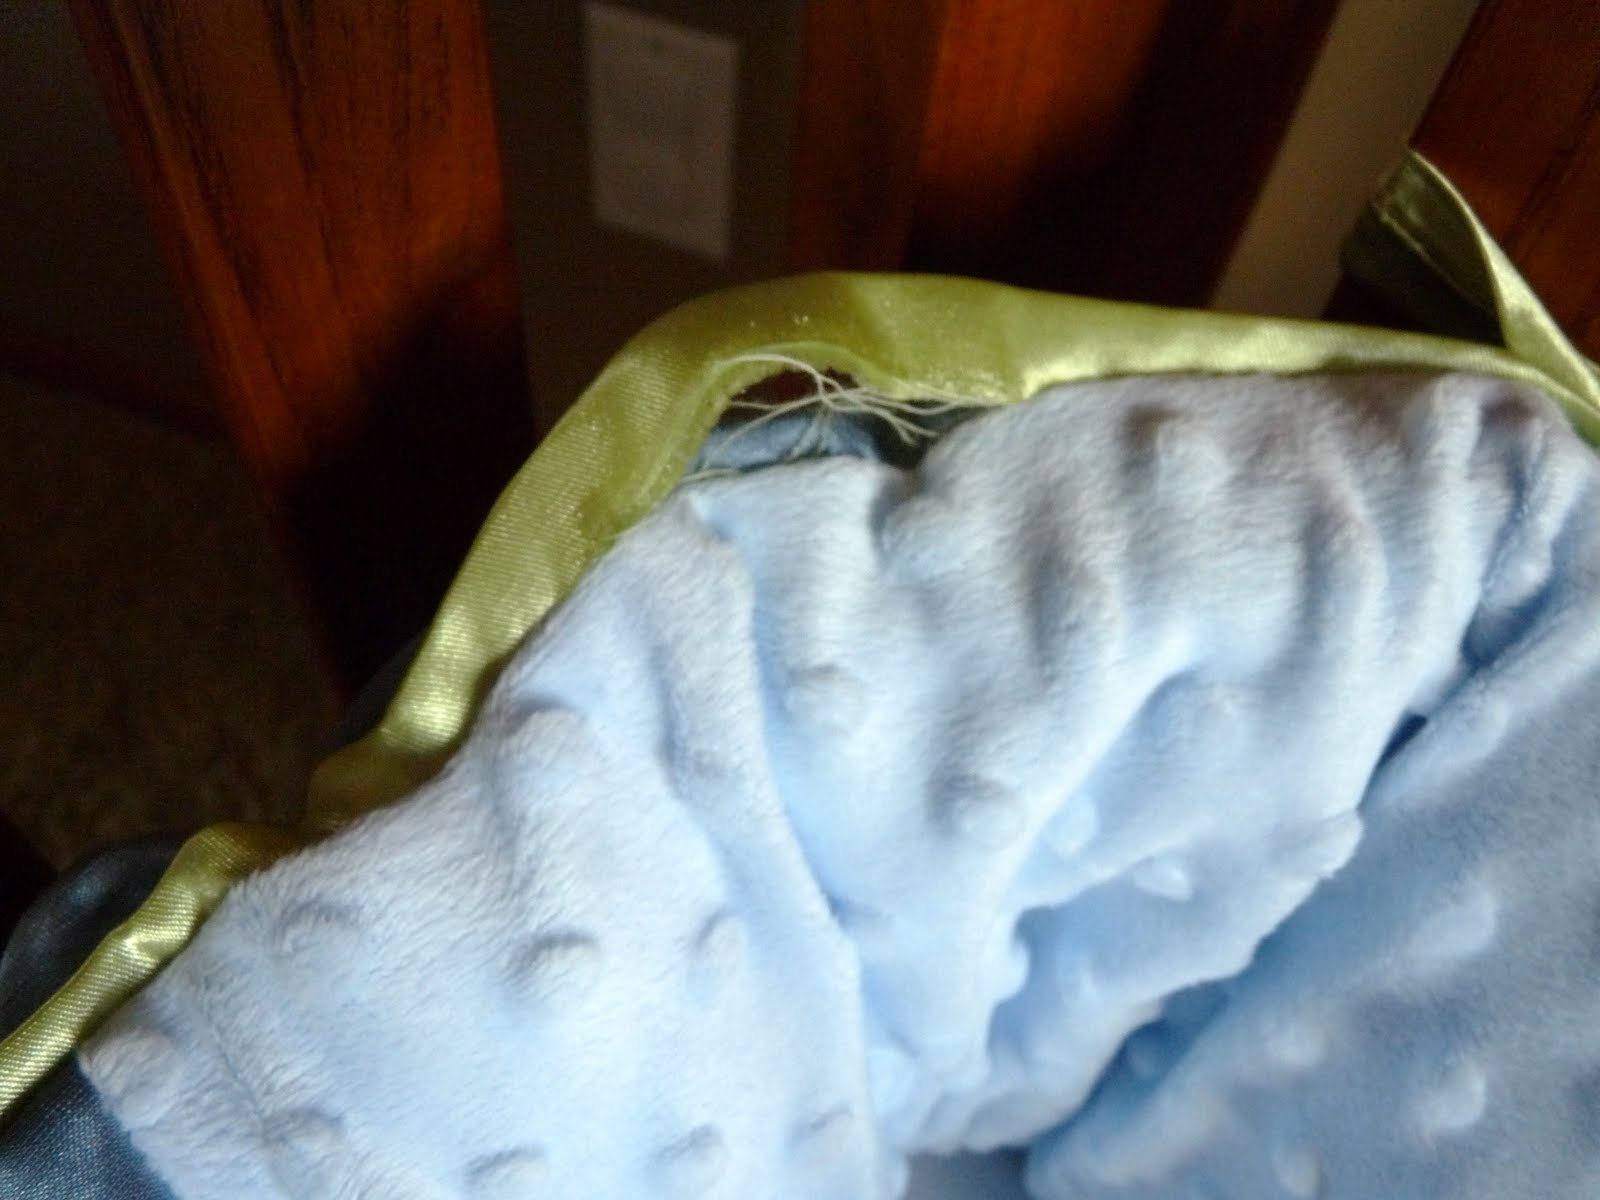
Those green ties were my nemesis!  That fabric did not hold the stitch so I sewed all 12 of them...sat down and flipped them rightside out with a wooden spoon and then discovered tons of huge gaping holes in the seams...it just like shreads at the seams....I don't know what I should have done different....so then I had to just hand stitch the open seams.  That was the most annoying of all the things....but so much went wrong with this project I can't even remember it all anymore, I've blocked it from my memory! lol
Finally it was done, and when I set it up in the crib...I just pulled on the corner here slightly to fluff it up and that green trim just ripped right out...no there is not a hole in the main seam but the trim just shreaded and came out.  But you see what kind of trouble this turned crib bumper cover out to be!?!??!  lol...well, at least it's done and it does look better than BEFORE!  I hope my 15 month old appreciates what I went through so he doesn't have to sleep in a girly crib anymore!!! lol!

Friday, July 22, 2011

Exploring Omaha with Mom

Wow, I can't believe how fast the past month has gone by!  Since my last post we have been gone visiting family and friends, attending weddings, camping, baby showers, and then having mom mom visit us at our new home for the first time and exploring Omaha with her.  She was our first guest and it was SO nice to finally be able to accommodate her better than we have been able to with friends and family visiting in the past.  Being in a house 3.5 times bigger than our old apartment makes a pretty big difference!  I am still so excited about having a garage after years of giant apartment complex parking lots! Anyways, I have lots of blogging catching up to do but most recently...

Here are some of the things we did with my mom...

First we went to the World of Mexican Pottery which is located on S 24th Street between M and O streets in Omaha which is a cool little historic district.   Renowned for its cultural influences, including the historic location of Omaha's Greek, Russian, Polish and Czech immigrant communities, as well as the city's current growing Latino community, including Mexicans* 
World of Mexican Pottery is a unique store, tons of real clay chimneys, planters, urns and other decor that is really really well priced!  You can get a pretty clay fireplace/chimney for under $100 and they are gorgeous!  My mom wants to get one but will have to plan a trip to drive out here to be be able to take it back home.

 After walking through the rest of that historic district, we had enough time to drive up to the Mormon Trail Winter Quarters for a free tour.  It was really interesting and didn't take too long (which was good with the kids).  They had a little sod house/cabin set up with 2 beds inside and a little loft above both, a tiny eating area and fireplace.  It was so tiny and apparently 2 families/~15 people would share one of those little houses.

That night we got my mom to play pool with us on our pool table that came with the house.  At first she seemed a little reluctant but then once she got going she wasn't too bad and was having fun, she is so cute!  My mom and I played a game and it was going so slow! lol! I asked Tyler "I wonder what's the longest game of pool every played"... his reply was "We're finding out right now!" lol!  My mom beat me but it was close!

We took her to the spray park and fed the geese...


We played in the sink to cool off with this big heat wave that has been going on....

We went to the zoo when it was 96 degrees with 88% humidity!  We were totally drenched the whole time it was so hot!  When we got near the end, just before the butterfly exhibit and aquarium, I saw a frozen lemonade stand and boy was that heaven in a cup!  The Henry Doorly Zoo in Omaha is the coolest zoo I have even been too! The habitats are seriously amazing, I've never seen anything like it!  It was HUGE and next time I think we are getting a yearly family pass so we can just go and see parts of the zoo on multiple occasions instead of trying to do it all in one day...we were there for hours and still didn't see everything...
 Budgie Encounter at the Henry Doorly Zoo
bring cash, $1 per feeding stick


And of course we took my mom to Nebraska Furniture Mart....that is an attraction on it's own!  It's not just a furniture store, it's a complex of huge buildings with the biggest furniture store, electronics store and clearance stores ever!  We spent quite a bit of time looking at everything, they have all kinds of styles and it doesn't just all look like some typical out of the box furniture, they have everything and all kinds of unique, awesome things in all styles and I found my dream dining table...although it's $10,000 so good thing they have nice things in all price ranges!  It's so exciting to just envision the different possibilities!  I've got my eye on a couple of the dining room sets and bedroom sets.  My mom was such a sweetheart and got us this cute bistro set for our deck as a housewarming gift! I LOVE IT!  We found this at Mrs.B's clearance center, just what we needed out there...it's perfect...


 And of course we did lots of baking and relaxing, she showed me how she makes gluten free bread and I got her hooked on my gluten free dark chocolate covered peanut butter cookies, and we went to Hobby Lobby at least twice, where my mom also picked out this awesome wall clock for us and just our luck all wall decor was 50% off...I freaking love that store.
 Starting to get a little less bare in the dining room....

Greased out from the heat wave...what's the point of putting on makeup, it'll sweat off in 2 minutes!

Her flight got delayed so we got to keep her for an extra night (I couldn't have been  more excited about a flight delay!) so I drove her through downtown on the way back from the airport to see the big bronze pioneer sculptures at First National's Spirit of Nebraska's Wilderness and Pioneer Courage Park
photo credit:Mike Kleveter
and drove through the Old Market just  for a peek...we'll go back and walk around next visit, it was just too hot and after the zoo day we were done with sweating our pants off!
Omaha Old Market
photo courtesy Marriot
old market passageway 
photo courtesy omahanightlife.com
We'll go back at night when the lighted horse drawn carriages are going around on the cobblestone streets.  And to finish it off, we left the kids with Tyler and had a girls dinner out at the Farmhouse Cafe!  The perfect place for potato lovers like us! :) The last 2 nights we stayed up and watched Food MattersFoodmatters and then that extra bonus night we watched EmmaEmma What a CUTE funny movie! We loved it! It's been forever since watching a really good movie like that!  I recommend both Food Matters and Emma for your list of things to watch!  I'm still chuckling over some of the dialog in Emma.