Showing posts with label inspiration. Show all posts

Monday, January 5, 2015

Is This the Best I Can Be


A little belated, but Happy New Years Y'all eh?!?  I guess that's what I should say since I'm a Canadian turned Southerner, can't forget where I came from!  Speaking of that, it is important to remember where we came from.  That doesn't mean we have to stay there though, dwelling in the past and clinging to whatever hold places, things, experiences. ideas and people of the past may have on us...good or bad. Clinging to a good thing in the past too tightly  or clinging to a negative for too long... To be the best we can be, is to be able to see all our experiences we've had, how they may have influenced and shaped us, but then take what's valuable towards being who you really want to be and then letting the rest go.  Forgive, Forget, Let go of ideas that hold us back from pursuing the path we feel we should go but are afraid to because it's against the grain.  Letting go of our need to please and worrying what other's will think and how we will explain ourselves.  Stop resenting where we are because maybe the past was better than the present...and just trust that you are wherever you are for a reason and to bloom where you are planted and as the seasons change, so will you.  This is all stuff I've been having to work on and learn.  A LOT.  So I'm really writing all this to myself FYI.

I pulled out some old CDs tonight trying to find something new for J to listen to and came across this old CD I  completely forgot about.  The album is Elisa, Then Come The Sun....oh wow I forgot how much I enjoy it.  Especially this song

 Just listening to it reminded me of myself and my time before becoming a mom and even as a new mom and how I envisioned things were going to be.  I'm not complaining, I am so thankful for the life I've been given, but truth is for us all, life isn't as idylic and simple as we imagined it would be, even if we have much to be thankful for, life can still get rough.  But then I just wonder...how much of that idylic vision we HAD gets washed away from our minds because of us just doing what everyone else does and not having the confidence to just do our own thing without apologies.  I know why we (I'm thinking from a mom perspective) want to do what's best, because we are always worried if we are doing what's best for our kids and in our quest to do what's best...we sometimes miss what's best, and we sometimes lose ourselves....and miss out on our full potential and our kids full potential.  

What if in our quest to be the Best we can be and do what's best for our kids...we stopped trying to be the best and do all the best things and follow all the best advice and be like our best friends, and do what the best experts say to do, be like that "best" mom we know who has the "best" kids, or the "best" husband or the "best" decor or the "best" job or the "best" school/curriculum and we just got quiet within ourselves, tap into the inspiration from the Holy Spirit and let our intuition/the Holy Spirit guide us to be the best we can be, and not be sorry about it.  We can't please everyone.  We were all uniquely created, all structures are man made...if you are finding yourself lost in life trying to keep up with it all...well...SLOW DOWN and let The One who made you grow you into the best you can be, He designed you, He knows you.  We weren't all made to do everything the same way.  We weren't all made the think the same way.  We weren't all made to learn the same way.  And we definitely weren't made to be boxed into this or that category, we were made to grow and learn continuously.  We need to be open to change and maybe doing things differently than what we are used to doing.  

I think it can be easy to miss out on the best trying to do the "best" all the time.  I guess it all goes back to the whole Mary & Martha thing.  If we are always a Martha, trying to make sure everything is the "best", we can miss out on the best thing right in front of us...in her case that was sitting, listening and resting in the presence of The LORD.  For us it is that too, as well as missing out on resting in the presence of our children, spouse or whoever, just sitting, listening, engaging without an agenda.  Enjoying our time with them and ending our day not exhausted and weary because we are too busy and putting to much on our plates thinking that's how we be the best we can be...but becoming anything but that.  I mean, If we just feel "a little over zero, is this the best we can be?"  

“Martha, Martha,” the Lord answered, “you are worried and upset about many things, 42 but few things are needed—or indeed only one.[a] Mary has chosen what is better, and it will not be taken away from her.”

what can you take off your plate?  What can you do to live more simply?  Few things are needed.  Same with our kids...we get worried and upset about many thing but few are needed.  Let's not miss out on what's best trying to keep up with the "best" or what other people think is "best".  Let's break free and just live our lives, not being who other's want us to be or who we think we "should" be...but allowing God to grow you into who he designed you to be.  Give yourself and others grace and don't be afraid think outside the box...and while you're at it, get on the floor and turn that box into a fort, or space ship or car or whatever with your kids and turn it into a lesson without them even knowing it...then use the box for fire starter and you have science!

Friday, September 30, 2011

Scrappy Saturdays Week 7


WOW! I honestly can't believe it's Saturday already!  The weekend kind of snuck up on me this week it's been busy! Here are the featured posts from last week..

I L-O-V-E this lace and denim skirt refashion by Babblings and More I want one and I know my daughter would gladly take one too! 

I have been really enjoying all the fall wreaths and this is the first Argyle one I have seen....and love the owl detail!  Check it out over at For Mamas. By a Mama

Check out these great homemade window treatments at Beyond the Screen Door but not only that, I like all the other decor and arrangements you get a peek at in her picutures.


AND because we can't get enough of the different ways to use pallets, here are a few things Reno and reorganization does it


Alrighty, if you've been featured, you can grab a brag button here

if you like this linky/blog you can follow me on GFC, Facebook, Twitter, Pinterest or vote for me on Top Mommy Blogs...:) 
Visit some of the other links and leave some comment love :)
No Giveaways
grab that button below and post it with your other linky lists


Candace Creations


Saturday, September 24, 2011

Scrappy Saturdays Week 6

Hello again!  I am excited about last weeks link-up and all the great projects! Let's see if we can break 50 links this week!  Ok and now to highlight some of the great posts from last week...

Check out these amazing mason jar lanterns by A Lettered Life! These are fantastic and I so want to copy this!  LOVE LOVE LOVE...and a PIN!

And Ellen from Creative Passage collected orange wool sweaters for a year to make this gang of pumpkins, I'm just lovin' them!  Great way to re purpose those old sweaters that I'm sure no one else would have wanted...:)

Now check out these adorably cute custom business cards by Sew Gloried , I love how she used the edge cutter to make them soooo cute!  I want these!

And talk about a redo!  This is one cute onsie redo by Amanda at The Little Giggler, isn't this so girly and adorable? The cute little munchkin modeling the outfit puts a smile on my face! :P

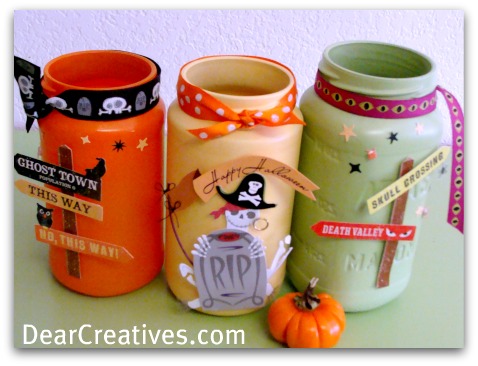
And we get even more fun  mason jar inspiration from Dear Creatives from her Fall & Halloween DIY Mason Jars....so cute!

Alrighty, if you've been featured, you can grab a brag button here

if you like this linky/blog you can follow me on GFC, Facebook, Twitter, Pinterest or vote for me on Top Mommy Blogs...:) 
Visit some of the other links and leave some comment love :)
No Giveaways
grab that button below and post it with your other linky lists

Candace Creations


Wanna Host Your Own Linky?
Click the frog to start your blog hop


Thursday, August 18, 2011

Inspiration File....

So I have always been addicted to blogland (since discovering it) and seeing all the great ideas and inspiration out there but lately I have been finding and saving great ideas like no other!  It's extra exciting now that I'm trying to fill in and decorate our new house (while spending as little as possible)...anyways, here are just a few things I've come across that I just had to share because of their awesomeness and I REALLY want to make them.

First check out this

Mondo Pom Trim Pillow w/ tutorial by Living With Punks


The Not so Funny Mustache Shirt by Running With Glitter

Love Map by Minimoz


And I've been LOVING the various growth charts going around like...

Growth Charts Everywhere!!!

The Creative Imperative Growth Chart

how to make a wooden growing chart by family ever after

 or this one DIY Growth Chart by love-2-create


and THIS DIY Growth Chart from The Cellar Stories


I can not wait to make one of these fun growth charts....we already started marking our daughter's height on the wall in the laundry room and I would love to just continue it on something cute like these!


Candace Creations


Come back this weekend to join in on Scrappy Saturdays Weekend Linky

Candace Creations


Monday, July 25, 2011

Restoration Hardware Inspired Pillows - Tutorial

Restoration Hardware Inspired Pillows
hand painted on canvas
  I have a thing for the natural linens and natural and neutral colors of Restoration Hardware and am a fan of the  

Presse Parisienne Burlap Pillow Cover.  I love the faded charm and vintage look so I decided to make my own version.  Now, I know these are not a actual knock-off because I didn't use french words to mimic the old bank bags and flour sacks like Resto did and they aren't the exact same style but it was the inspiration for this project.  I like the idea of incorporating stories and meaning throughout your home as much as possible...doing things with intention.  Kind of like how in Art History you see a painting that's interesting/beautiful to look at and you can enjoy it without knowing anything about it, but most likely, there is something more to it, a depiction of an event, a story, symbolism of some kind or another that the artist intentionally added.  So not that these are some great work of art like that....but I was just going for the symbolism aspect.  OK so I made the first pillow a tribute to our wedding date, but the other two pillows may just look like more nautical themed decor, but they represent our family history because my husbands ancestors were ship builders and that's where his last name comes from, and then I also remembered that some of my ancestors were ship owners that brought over some of the first Americans.


This project also cost me nothing since I had everything on hand...I have a big roll of raw canvas from an art project I did back in the day.  

Supplies
raw canvas, burlap, or undyed cotton fabric or other linen-type fabric
burnt umber acrylic paint 
flat paintbrush
scrap cardboard
charcoal
pencil
sewing machine
matching thread
pillow forms
image or lettering printed to desired size (how to print a picture on multiple pages info here)
tape
scissors


Find or create an image you would like to transfer onto your Restoration Hardware pillows.  If you are doing words, just select the right font and sizes and print out.  Figure out the size of your pillow and how big you want your image to be and click here to see how to print a picture on multiple pages.


Trim the pages and line up your image and tape all sections together.

Flip your printed image over and shade the back with charcoal as pictured.  I used a willow stick the first time and it wasn't as messy as the chalky charcoal I used in the picture.


Once the back surface is covered with charcoal, flip the image over and line up on fabric (raw canvas in my case) and tape down so it doesn't slide around.


Using a mechanical pencil or sharpened pencil, carefully trace over your image with firm pressure to transfer the image to your fabric.  Carefully pick up one side and take a peek under the paper to see if your image has been fully transferred or if you need to go back over a couple areas.  It won't be perfect but it will give you a good outline to go by.


Using Burnt Umber Acrylic paint (I used Dick Blick) I would get the paint on my flat paint brush and then run it over the cardboard to keep the tip flat and remove excess paint.  I did not use any water.  Then carefully go over your pencil lines and paint the outline of your image (or just paint your letters this way). You may want to practice first on some scraps.  After I had my outline done, I went back and did some filling in and shading but it was very minimal...as you can see in the ship wheel, on the spindles I would place my brush down on the outline and then drag it towards the middle of the spindle and pull up just a little bit and did that all the way up the spindle to create some dimension.  But how you decide to embellish on your outline is totally up to you and dependent on your image.  But with these pillows, the simpler and more basic you keep the image and detail....the better.  I also reminded myself not to go crazy trying to make these so perfect  because they are supposed to have a vintage, worn look to them and so every line doesn't have to be perfectly evenly shaded.  And I promised I wouldn't care when they got thrown around either, if the image gets worn from use...it'll just add character. :)

Now, measure the size of your pillow form and then cut the fabric to fit, adding room for seam allowance. (I added 1/2-1 inch which is being generous, but I figured I could always make it smaller...can't make it bigger)  Then cut fabric for the back, cut two pieces large enough to overlap by a couple of inches.  Give yourself a few inches to work with.

Fold the raw edges back on the overlapping pieces and iron as pictured above.

Sew a straight seam to finish the edge on both pieces.

Now line up your pieces with the right sides of your fabric facing each other.  Finished seam down against painted fabric.

Place the overlapping piece on, right side down also as pictured.

Pin around the edges.


Sew a 1/4 inch seam around all four edges, back stitching at start and end.

Using the slip opening, flip the pillow cover right-side-out.

Take pillow form (or in my case, nasty crusty kid wrecked pillow) and insert it into your custom, hand painted "vintage" burlap pillow cover to add some rustic charm to your space!


On the anchor, once the dry brushing was done, I wanted to add some faint color to the rest to add more dimension so after I had painted the outline and dark areas of detail, I did go back with a little water and a super small amount of paint just to barely tint it and went over the interior of the anchor, added a little more detail.


NOTE: I just saw this tutorial on Knock Off Decor and it's a much easier/faster method, especially if you don't feel comfortable hand painting!

Drop Cloth Pillow Case Knockoff

from the Shabby Beach Nest