Boutique Style Paper Hanging Butterflies
for Baby Girls' Nursery
Knock Off Alert! My lovely sister (whom you can learn more about
here) is having her first baby in a couple weeks and it's a GIRL! I am over the moon excited about her becoming a mom and I can not wait to meet the little bundle! So when I was visiting, I wanted to be able to spoil her as much as I could, but I'm not rich either! So I was looking through her registry and saw this adorable
hanging butterfly mobile
I thought it was precious and also thought it looked pretty easy to make! It is $57 on Amazon - you can find it
Here and I was able to make one for about $5! I wanted to spoil her as much as possible and was excited I could mark that off her registry and still be able to get her other things...
Here is what you will need:
Large embroidery hoop
white paint and foam brush
thin jewelry wire
very thin/fine fishing line
cardstock and vellum in various shades of pink/cream/white (or to match your nursery colors)
Pin Needle
Scissors
disclaimer: Sorry, I made this at night and I hate it when I don't have good lighting for the pics!
Remove the inner hoop and give it one or two coats of paint.
While your paint is drying, find a butterfly and flower shape you like, I searched for silhouettes and clip art till I found the right shape, however I still ended up altering the butterfly a little bit. Print and cut out your templates. Mine were about 2 to 2.5 inches in size roughly...Use your templates and trace the images onto your sheets of vellum and cardstock
Begin cutting. This would go even faster if you have a nifty flower and butterfly punch or cricut, but I'm a cheapo, I do it all the old fashioned way :)
for now at least...
I was able to save some time by folding my cardstock accordian style and cutting out multiple butterflies and flowers at once...although this doesn't always work out so good...you have to be really careful and cut very carefully so the lines are crisp and nice.
Once you have cut out a bunch or butterflies and flowers for this adorable nursery decor....
Take a pin needle and poke a small hole right through the center of each butterfly and flower.

Get your jewelry wire and wrap the wire tightly and securely around the edge of hoop, then pull it straight across the inside of hoop and make sure there isn't any slack in the wire, then secure on opposite side of hoop. Make at least four strands of wire crisscrossing throught the hoop creating a pie...like below. This is what you will secure your butterflies and flowers to.
Now take your fishing line and determine how long you want your longest strand in the center to be. How long do you want it to hang down? Cut a couple of strands of fishing line that length and then cut the rest just slightly shorter and cut a whole bunch..until you run out of fishing line.
Take you line and tie a double knot on the end and then thread on a butterfly or flower. A few inches above that, tie another double knot and thread on another butterfly or flower. I placed 3-4 butterflies and flowers on each strand for the most part. Tie the end of the strand to the center of the mobile where all the wires intersect. Work your way out from the middle.
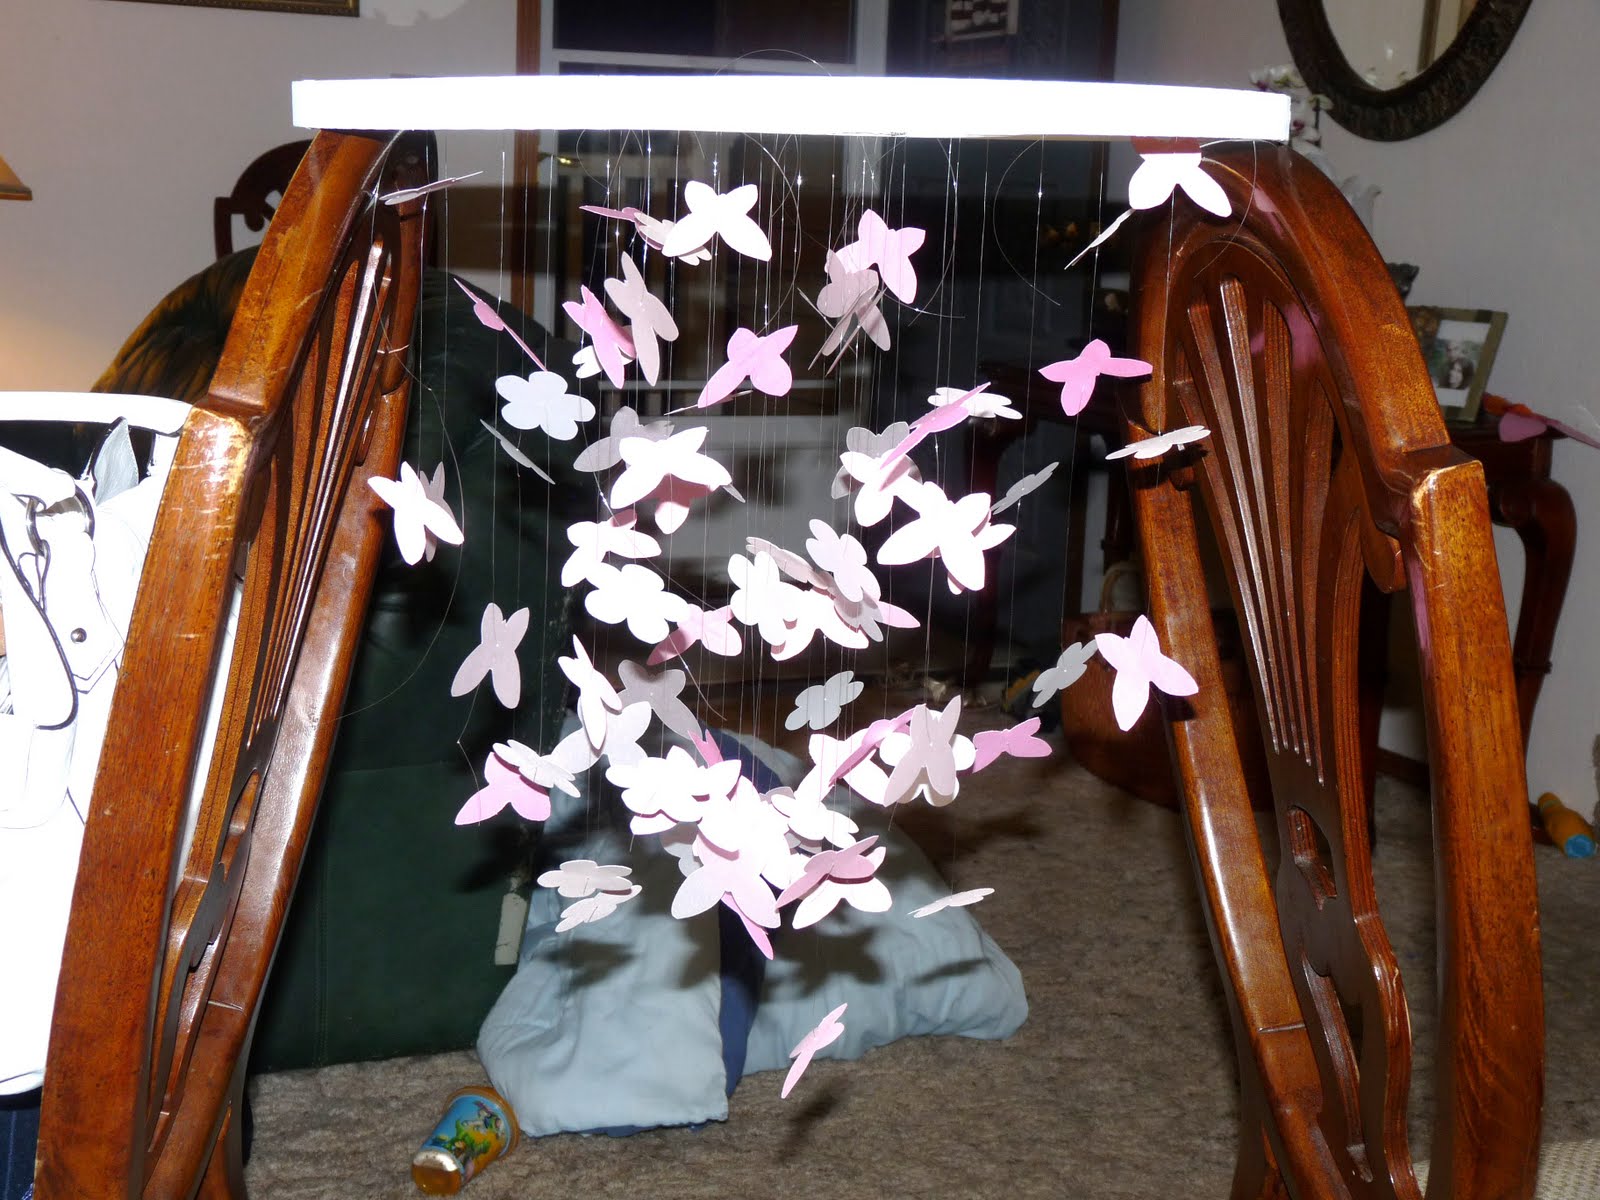
At first I had it on the table working like this....
But then it was easier to place and arrange the hanging butterflies and flowers on the mobile while it was hanging up, I just rested it over the backs of two chairs.
As you work your way out, to create a tapered effect, move the fishing ling up and down till you determine the right height and then tie to the wire above...you will have more extra fishing line at the top of those since you didn't let them hang as long. When you are done, just trim all the excess line off the top. I placed 5 strands from each section of wire. You can do more if you want a fuller hanging and you can add more butterflies and flowers per strand as well to make it more full.
Use the jewelry wire or extra fishing line to hang butterflies from ceiling. Just screw in a ceiling hook to hang from.
I will update with a better final picture when my sister gets it set up in her nursery!
Some of the other things I was able to get for her since I saved on this gift was


And I'm really excited about the travel system we went in on with the rest of the family for her...I forget which one it is now but it is the best stroller/carseat combo I've ever seen. The stroller is soo cool, every single annoying feature on every stroller I've had has been address and it is one stylish, trouble free, smooth ride! It was so fun to "shower" her! I was going to put on a baby shower for her, but we had an emergency situation, basically she is type 1 diabetic (since she was 9)...that night we went to get pedicures before my brothers wedding the next day...the salon had massage chairs which she turned it off as soon as she got in and realized it was on.... later her blood sugar got really high and wouldn't go down and she was going into preterm labor, at like 30 weeks I think she was. I went to the hospital with her and they treated her for preterm labor, gave her an injection of something to stop contractions and did a test that said "no you won't have the baby within two weeks" and so they sent her home although blood sugar was still off the charts, puking violently, massive contractions and chugging water but it was going right through her. We came home and her contractions were just getting worse...I was timing them...she was like in true labor with contractions, every 7 minutes more or less...still puking, and still incredibly high blood sugar. She had tried changing her pump site and doing everything she could adjusting her pump and checking it. After being home for 45 minutes or so, we just knew we never should have left the hospital and we went back. They wouldn't let her into the ER but sent her back to L&D and they didn't really know what to do with her there since she wasn't actually going to have the baby. She normally sees a team of specialist where she lives, but we were in a different town with a smaller hospital, anyways...finally, they found out there was a resident in the hospital that was training under her Dr in the city so when she came in, it was a godsend! She immediately knew what was wrong and took over...My sister had gone into Diabetic Ketoacidosis which is extremely dangerous and life threatening. So she ended up spending the next 2 days in the ICU, couldn't go to my brother's wedding and was ordered to go straight back home and see her regular team of specialist so we had to cancel the baby shower. After all that, she finally came to the conclusion that the massage chair at the salon had put pressure on her injection site of her pump and make a kink under the skin so she wasn't getting insulin (even though she turned the chair off...It put pressure on her as soon as she sat down because and caused the damage to her site unknowingly). Once her blood sugar got too high, even though she tried changing the injection site, it was too late and she needed medical intervention. It was one intense experience I will tell you that but I'm so glad I was able to be there for her! So we had the travel system with some of her gifts set up in the living room when she got home from the hospital. Thankfully she and baby recovered wonderfully from this. I'm so proud of her, she has taken such good care of herself and her baby during her pregnancy, and I just know she is going to be an amazing mom and I just am so excited and want to do so much for her...more than I can actually get done! lol! More than anything, I just wished we lived closer so I could be there for her all the time to help with the little day to day things...like run errands for her when she isn't feeling good, or driving her to the doctor, making her a batch of my granola bars so she could have something easy and handy to eat, help set up the nursery and wash and put away all the cute little baby outfits, cook meals for them when the baby comes and anything and everything else
Oh and btw- thank goodness for the Ipad2! My hubby got one from work and my dad got one for father's day and we were able to watch my brother's wedding from the ICU over skype with the ipads. And at the reception, people took turns walking around with the ipad and we got to see all the action...technology at it's best!


